Navigation: Your Jemini | Super Fund
Open to view permission settings
To give an employee access to their Super Fund records in Your Jemini:
- Go to System | Security profiles.
- Open the Employee Security Profile.
- In Permissions, scroll down and expand Your Jemini | Employee Details to find Super Fund permissions.
- Tick the View, Add, Change and Delete boxes for Super Fund.
NOTE: The delete option is available for KiwiSaver and Super Fund, but not necessary, as employees can't delete these records at this time.
Additional step for New Zealand employee access to the Super Fund bubble
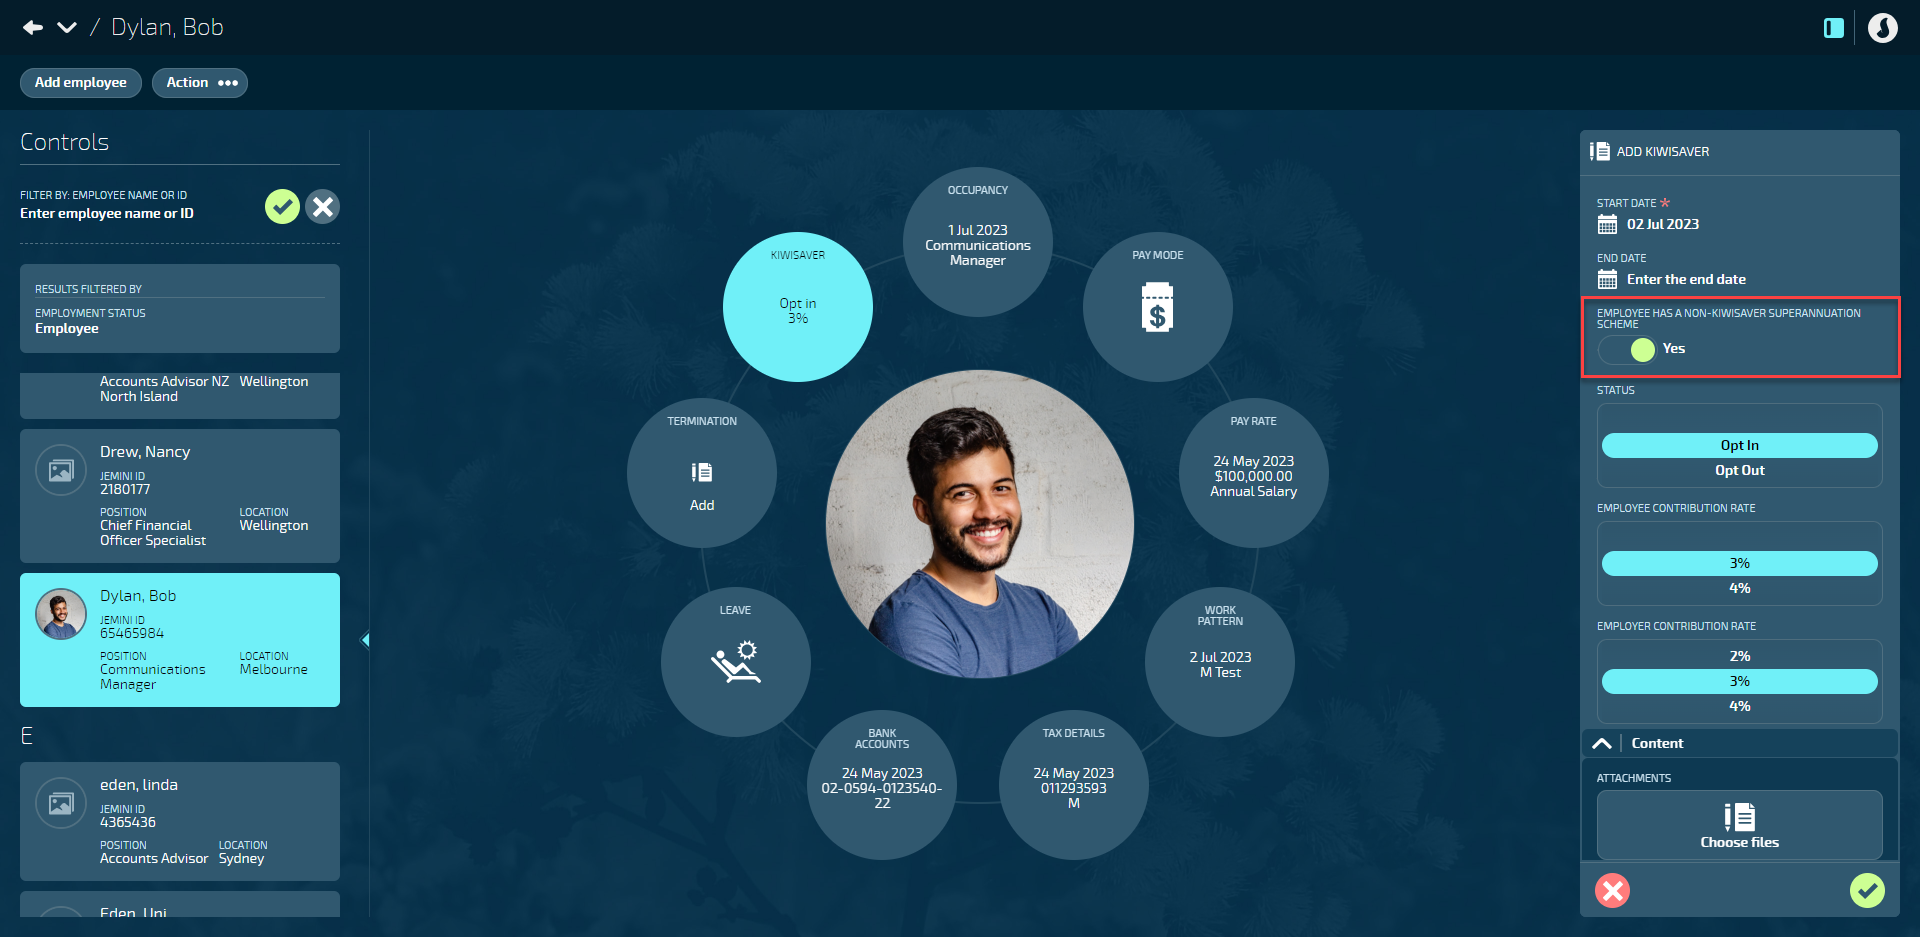
A New Zealand employee's Super Fund bubble can only be accessed if the EMPLOYEE HAS A NON-KIWISAVER SUPERANNUATION SCHEME setting in their KiwiSaver record is set to Yes. However, employees currently can't change this setting themselves. A manager must set it to Yes for the employee to access the Super Fund bubble.
The Super Fund bubble in Your Jemini allows you to manage your super fund (superannuation fund) records (excluding KiwiSaver, which can be managed in the KiwiSaver bubble).
Super funds have distinct requirements for New Zealand and Australia. This guide is specifically for New Zealand employees. If you're an Australian employee, please refer to Intro to Super Fund (AU) - Your Jemini.
Super funds are investment schemes primarily designed to offer retirement benefits and other long-term savings benefits. Make sure you don't confuse them with the government-funded New Zealand Superannuation (NZ Super) pension scheme for residents aged 65 and above.
Super fund schemes can have different requirements for employee and employer contributions. To understand these specific requirements, we recommend reviewing your employer's or super fund provider's policies.
If you have more than one super fund, you can create separate records for each one.
Below are instructions for adding, editing, and deleting a super fund record. When you add, edit, or delete a super fund record, it triggers the creation, end date, or deletion of the connected pay transactions that contribute towards your super fund.
How to add a Super Fund record as a New Zealand employee
- Go to Your Jemini | Super Fund. The dated SUPER FUND panel will open.
If you can't see the Super Fund bubble in Your Jemini, please reach out to your manager or system administrator. They'll need to activate the bubble from the KiwiSaver settings.
- Select Add a Super Fund record. The ADD SUPER FUND panel will open.
- Enter the START DATE. The START DATE will be autofilled with the first available pay cycle start date, but can be changed if you need to start your super fund payments later than then.
- (Optional): Enter the END DATE if required. The end date is when your super fund payments will end.
- Open the SUPER FUND backpack and select your super fund.
If you can't find your super fund in the backpack, please reach out to your manager or system administrator. They may need to add it to the backpack.
- Enter your EMPLOYEE ACCOUNT NAME. This is your super fund account name and will be used for future reporting purposes by your employer.
- Enter your EMPLOYEE MEMBER NUMBER. This is your super fund member number and will be used as a direct credit reference by your employer.
- The EMPLOYER CONTRIBUTION RATE, EMPLOYER CONTRIBUTION RATE SALARY SACRIFICE, and EMPLOYER FIXED VALUE CONTRIBUTION fields will be greyed out and can only be edited by your employer.
- Enter your EMPLOYEE CONTRIBUTION RATE.
- The value you enter will be the percentage deducted from your pay.
- This contribution is voluntary.
- If you enter a value here, you can't also add an EMPLOYEE FIXED VALUE CONTRIBUTION RATE.
- Enter your EMPLOYEE FIXED VALUE CONTRIBUTION.
- The value you enter will be the fixed dollar amount deducted from your pay.
- This contribution is voluntary.
- If you enter a value here, you can't also add an EMPLOYEE CONTRIBUTION RATE.
The EMPLOYEE CONTRIBUTION RATE and EMPLOYEE FIXED VALUE CONTRIBUTION can't both have a value.
If you want to set up multiple super funds with different types of contribution, you'll need to create separate records for each.
- Set EMPLOYEE CONTRIBUTION IS SALARY SACRIFICED to Yes or No.
- Setting to Yes means your contribution will be deducted from your pay before income tax has been applied.
- Setting to No means your contribution will be deducted from your pay after income tax has been applied.
- Before choosing, we recommend you review your employer's or super fund provider's policies and consider your specific financial circumstances and needs.
- The PAY THE ESCT ON BEHALF OF THE EMPLOYEE setting will be greyed out and can only be edited by your employer.
- (Optional): Complete the Content section by adding ATTACHMENTS or LINKS if required. This could include supporting information for your Super Fund.
- (Optional): Select one or more NOTIFICATIONS from the backpack if they're available. Notifications can be sent when a Super Fund record is added, updated or expiring.
- Select the {{glossary.Green Tick Button}} to save and close the ADD SUPER FUND panel. You'll see the new Super Fund record added to the CURRENT section of the dated SUPER FUND panel.
- You may now close the dated SUPER FUND panel.
How to edit a Super Fund record as a New Zealand employee
Once records have been added, they're locked for editing. However, you can add a new record to replace the old one.
- Go to Your Jemini | Super Fund. The dated SUPER FUND panel will open.
- Select Update Super Fund record. The ADD SUPER FUND panel will open.
- Enter the START DATE. The START DATE will be autofilled with the first available pay cycle start date, but can be changed if you need to start your super fund payments later than then.
- (Optional): Enter the END DATE if required. The end date is when your super fund payments will end.
- Open the SUPER FUND backpack and select your super fund.
If you can't find your super fund in the backpack, please reach out to your manager or system administrator. They may need to add it to the backpack.
- Enter your EMPLOYEE ACCOUNT NAME. This is your super fund account name and will be used for future reporting purposes by your employer.
- Enter your EMPLOYEE MEMBER NUMBER. This is your super fund member number and will be used as a direct credit reference by your employer.
- The EMPLOYER CONTRIBUTION RATE, EMPLOYER CONTRIBUTION RATE SALARY SACRIFICE, and EMPLOYER FIXED VALUE CONTRIBUTION fields will be greyed out and can only be edited by your employer.
- Enter your EMPLOYEE CONTRIBUTION RATE.
- The value you enter will be the percentage deducted from your pay.
- This contribution is voluntary.
- If you enter a value here, you can't also add an EMPLOYEE FIXED VALUE CONTRIBUTION RATE.
- Enter your EMPLOYEE FIXED VALUE CONTRIBUTION.
- The value you enter will be the fixed dollar amount deducted from your pay.
- This contribution is voluntary.
- If you enter a value here, you can't also add an EMPLOYEE CONTRIBUTION RATE.
The EMPLOYEE CONTRIBUTION RATE and EMPLOYEE FIXED VALUE CONTRIBUTION can't both have a value.
If you want to set up multiple super funds with different types of contribution, you'll need to create separate records for each.
- Set EMPLOYEE CONTRIBUTION IS SALARY SACRIFICED to Yes or No.
- Setting to Yes means your contribution will be deducted from your pay before income tax has been applied.
- Setting to No means your contribution will be deducted from your pay after income tax has been applied.
- Before choosing, we recommend you review your employer's or super fund provider's policies and consider your specific financial circumstances and needs.
- The PAY THE ESCT ON BEHALF OF THE EMPLOYEE setting will be greyed out and can only be edited by your employer.
- (Optional): Complete the Content section by adding ATTACHMENTS or LINKS if required. This could include supporting information for your Super Fund.
- (Optional): Select one or more NOTIFICATIONS from the backpack if they're available. Notifications can be sent when a Super Fund record is added, updated or expiring.
- Select the {{glossary.Green Tick Button}} to save and close the ADD SUPER FUND panel. You'll see the new Super Fund record added to the CURRENT section of the dated SUPER FUND panel (or the FUTURE section if the start date you entered is still in the future). The previous record will move into the HISTORICAL section.
- You may now close the dated SUPER FUND panel.
How to delete a Super Fund record as a New Zealand employee
In Your Jemini, you can't delete Super Fund records yourself. Please get in touch with your HR manager or system administrator for assistance if you need to delete your Super Fund record.