Who can benefit from this guide?
Payroll managers and administrators who are responsible for setting up Business Leave.
If you need access to Business Leave, please speak to your system administrator or raise an iHelp through Infusion.
What you’ll find in this guide
Navigating to Holidays
Go to Pay > Holidays to start managing Public Holidays and Business Leave.
.png)
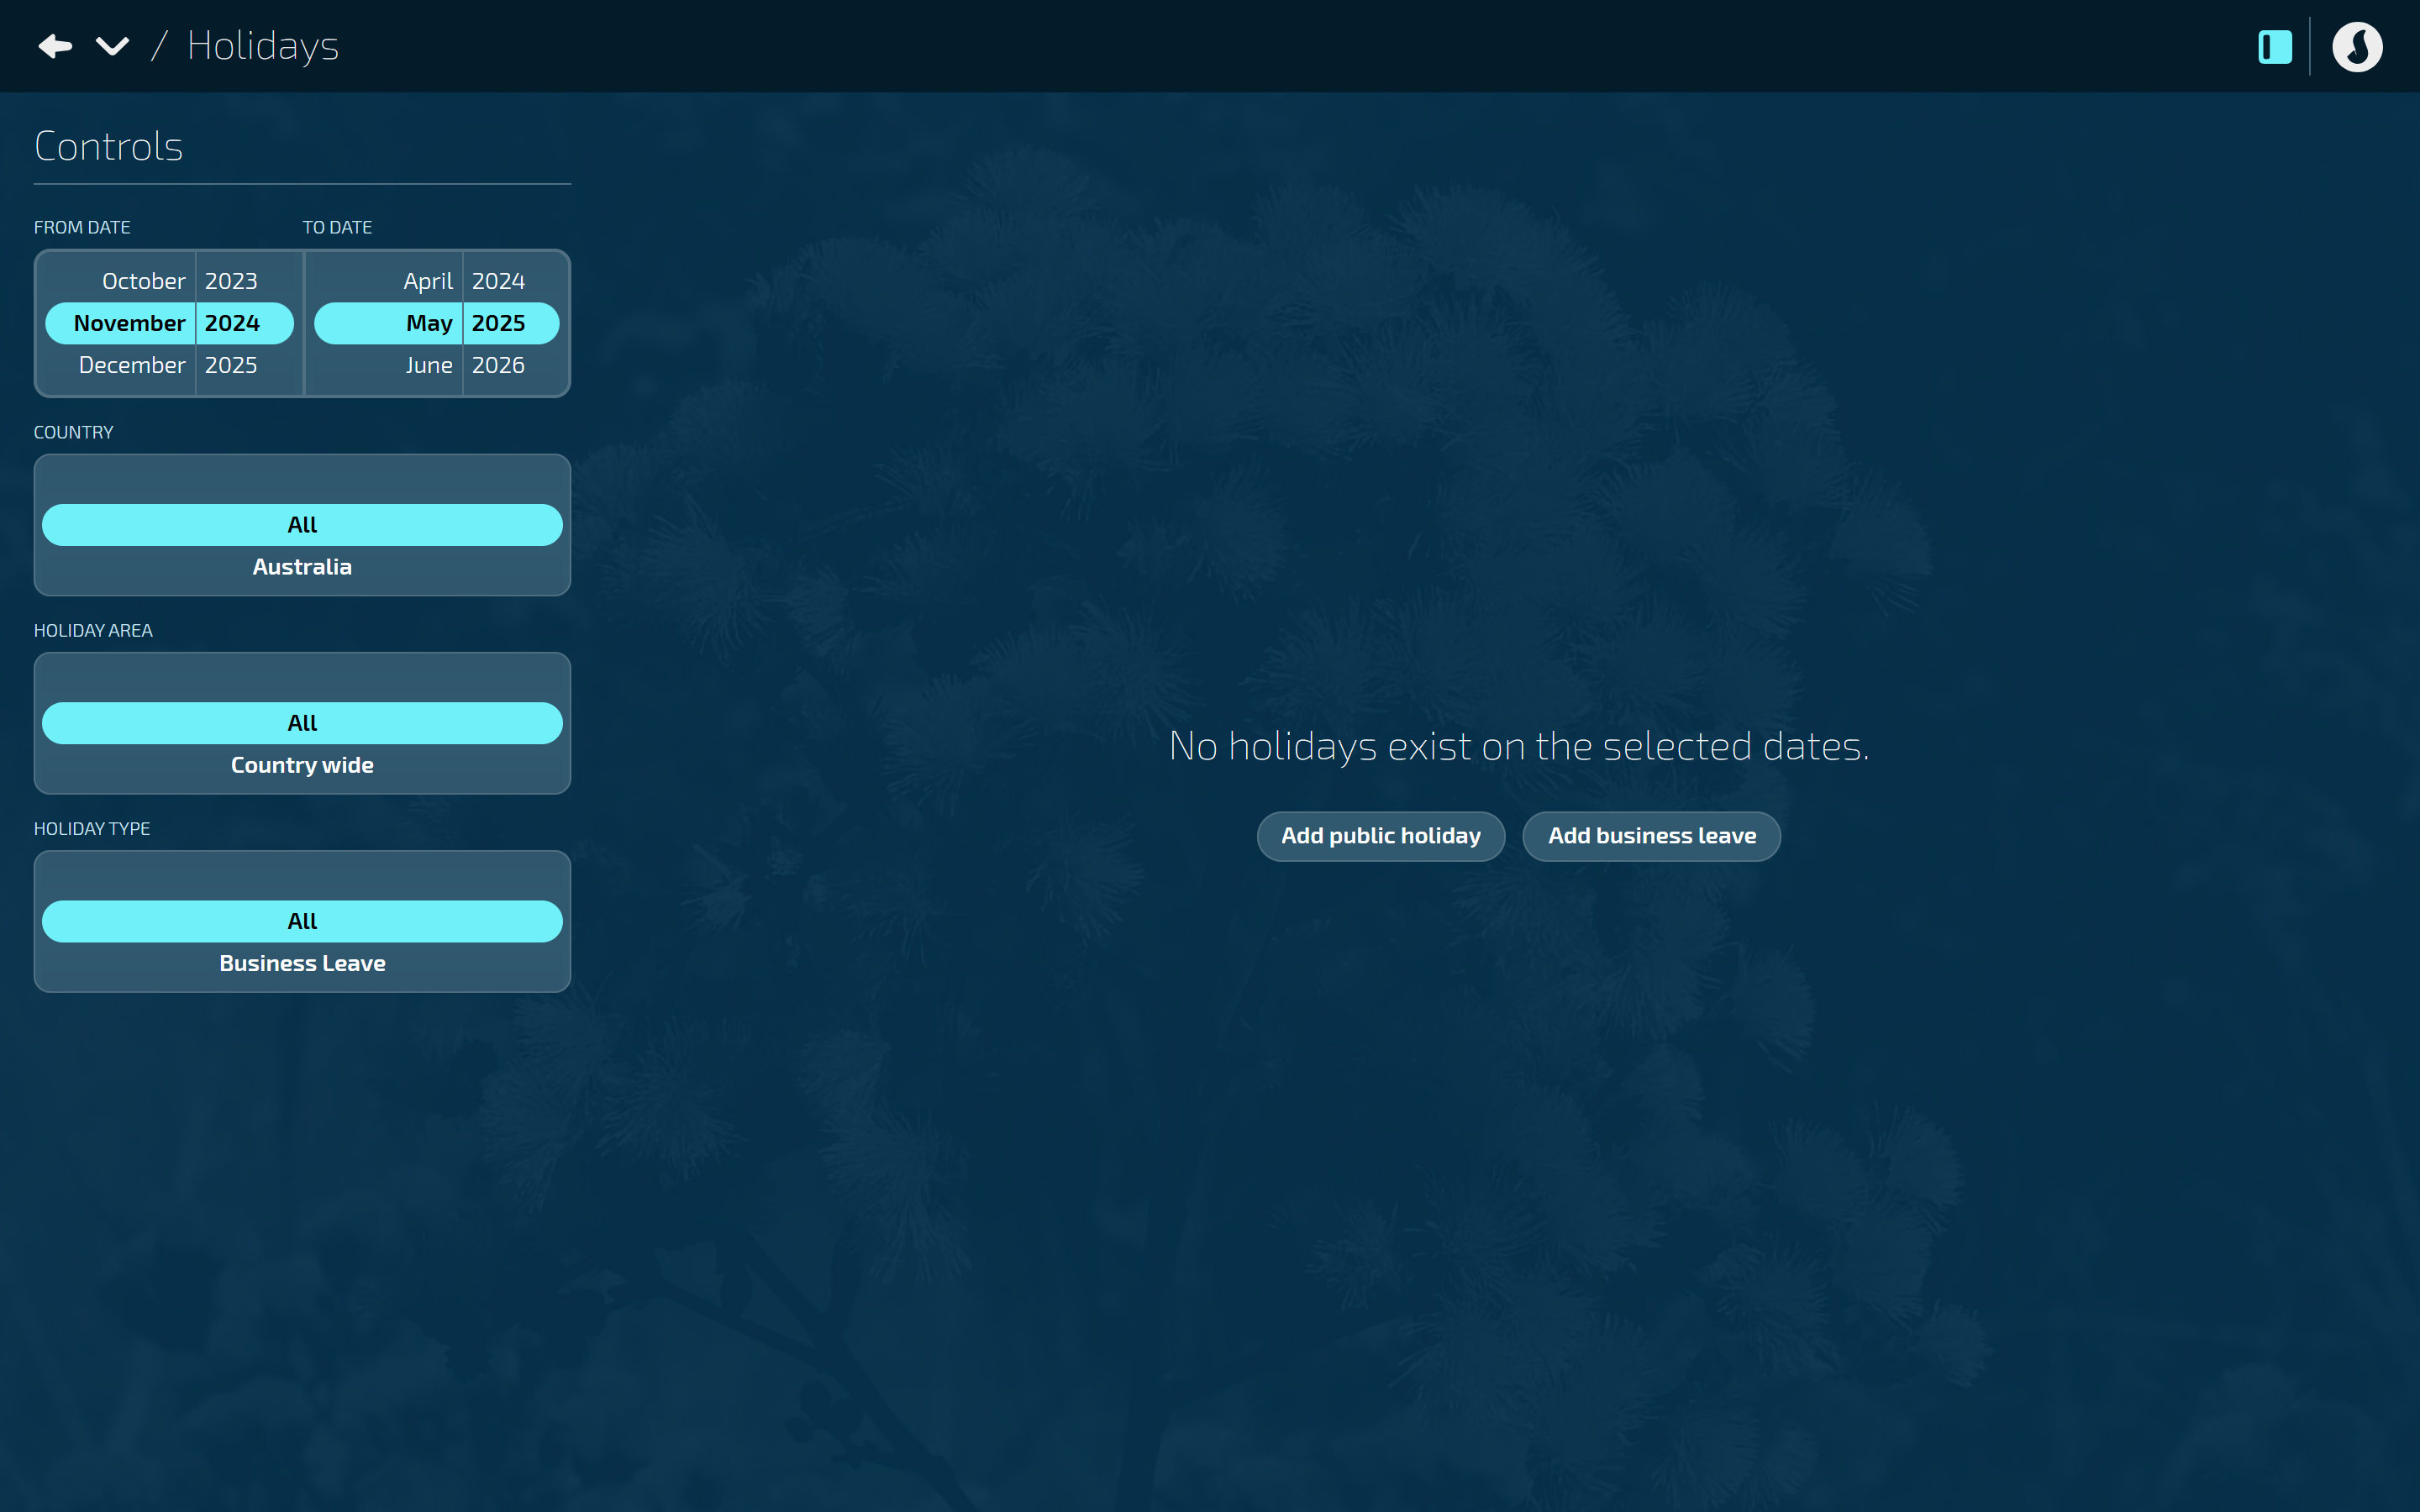
If no public holidays or business leave cards exist, you’ll see ‘Add holiday’ and ‘Add business leave’ buttons in the middle of the view. Select the ‘Add business leave’ button to start adding business leave.

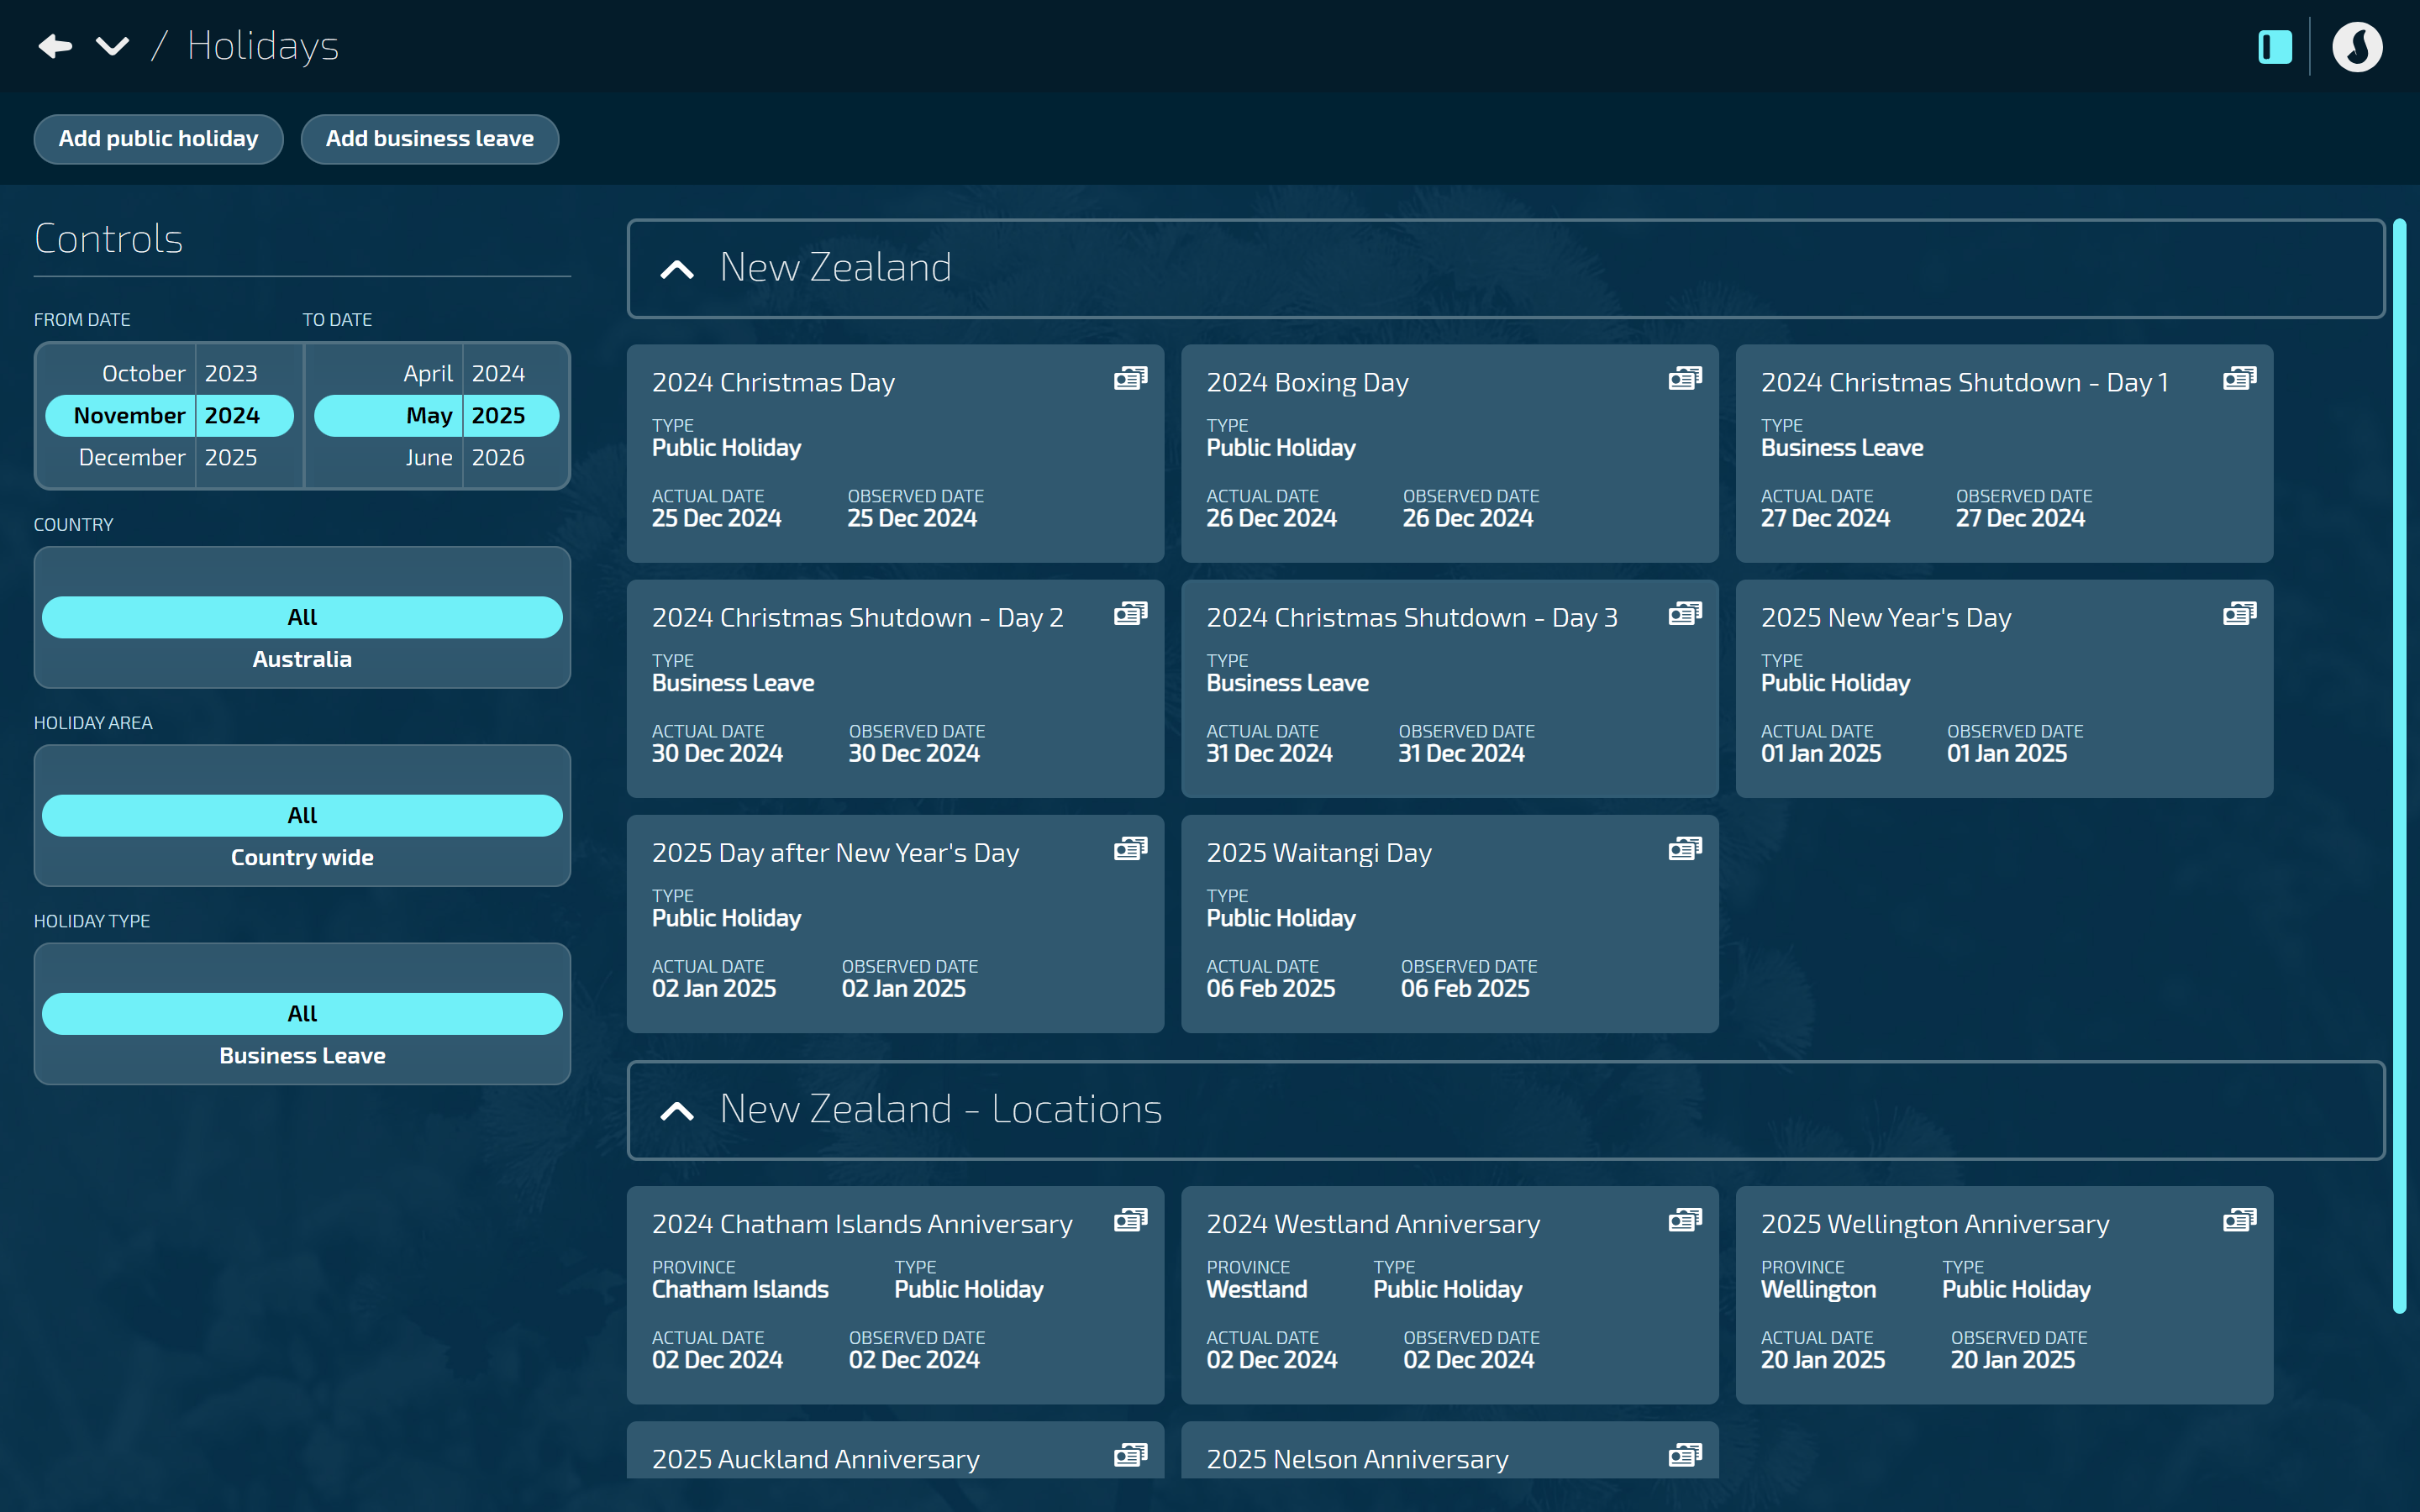
If public holidays or business leave cards have already been created, the ‘Add public holiday’ and ‘Add business leave’ buttons will move to the top left corner.

Use the Controls to filter your view
You can filter public holiday and business leave cards using these filters:
From and to dates
Country
Holiday area
Holiday type
How to add Business Leave

How to add Australian Business Leave
Go to PAY > HOLIDAYS.
Select Add business leave to open the ADD BUSINESS LEAVE panel.
Enter the NAME.
We suggest using a name that best describes the business leave.
Select Australia.
This is the country where the leave will apply.
Set LOCATION SPECIFIC to Yes or No.
Set to Yes to unlock the location types that refine the area where the business leave will apply.
Set to No to apply the leave country-wide. Skip the next step if you choose this option.
Select the LOCATION TYPE:
State/Territory
If you select this option, you’ll need to select one or more STATE/TERRITORIES and one or more LOCAL GOVERNMENT AREAS.
Organisation component e.g. branch
If you select this option, you’ll need to select one or more components from the ORGANISATION COMPONENT backpack.
Enter the LEAVE DATE.
Select the Green Tick Button to save and close the panel.
The business leave card will display in the Holidays view.
How to add New Zealand Business Leave
Go to PAY > HOLIDAYS.
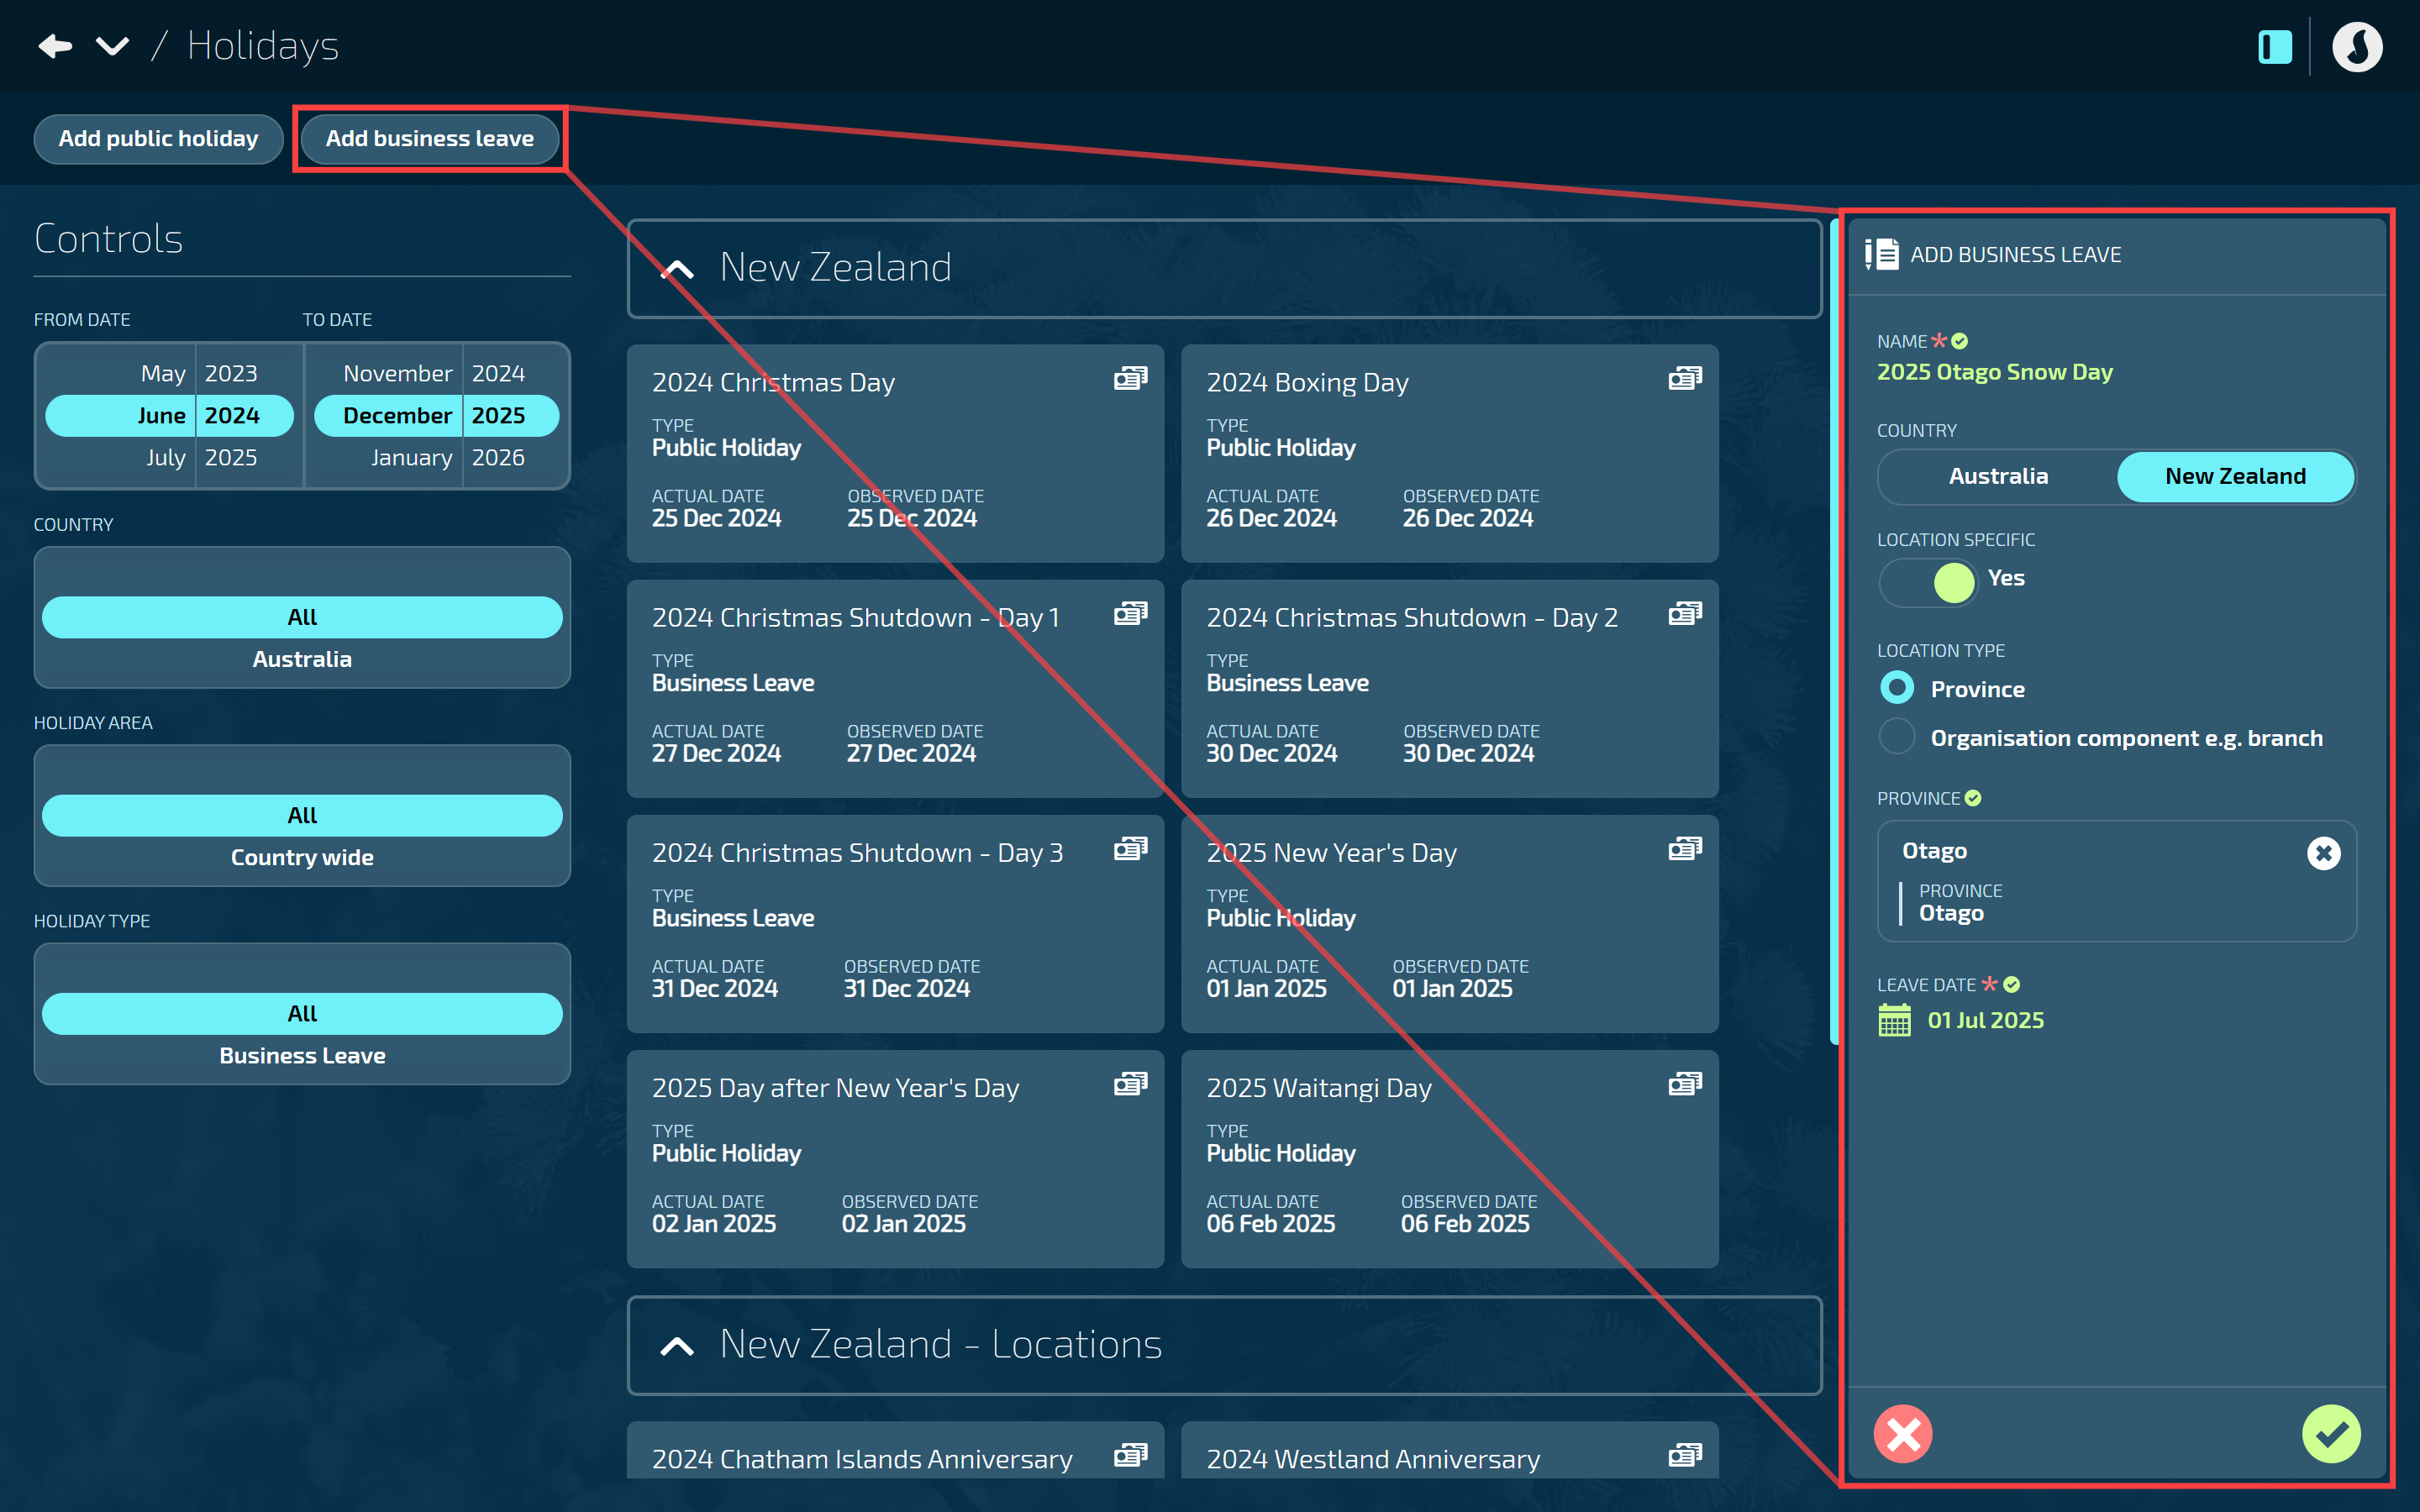
Select Add business leave to open the ADD BUSINESS LEAVE panel.
Enter the NAME.
We suggest using a name that best describes the business leave.
Select New Zealand.
This is the country where the leave will apply.
Set LOCATION SPECIFIC to Yes or No.
Set to Yes to unlock the location types that refine the area where the business leave will apply.
Set to No to apply the leave country-wide. Skip the next step if you choose this option.
Select the LOCATION TYPE:
Province
If you select this option, you’ll need to select one or more components from the PROVINCE backpack.
Organisation component e.g. branch
If you select this option, you’ll need to select one or more components from the ORGANISATION COMPONENT backpack.
Enter the LEAVE DATE.
Select the Green Tick Button to save and close the panel.
The business leave card will display in the Holidays view.
TIP
To make it easier to create similar records, select the Duplicate Icon to copy an existing one. For example, if you have a record called “Christmas Shutdown - Day 1” for 27 December and you want to create “Christmas Shutdown - Day 2” for 30 December, just duplicate the first record and then change the name and date.
How to edit Business Leave
IMPORTANT
If the business leave has been processed in a pay cycle or reached the direct credit point, you’ll no longer be able to edit the record because it will interfere with processed calculations. Create a new record instead.
Go to PAY > HOLIDAYS.
Select the Business Leave card you want to edit. The BUSINESS LEAVE panel will open.
Make any necessary changes to the business leave settings.
For information on each setting, refer to How to add Business Leave above.
Any settings that are greyed out can't be changed.
Select the Green Tick Button to save and close the panel.
How to delete Business Leave
TIP
If the business leave has been processed in a pay cycle or reached the direct credit point, you’ll no longer be able to delete the record because it will interfere with processed calculations.
Go to PAY > HOLIDAYS.
Select the Business Leave card you want to delete. The BUSINESS LEAVE panel will open.
Select the Delete Button.
Select Go ahead when the confirmation message appears, or select Go back if you’ve changed your mind.