Who can benefit from this guide?
Anyone who’s responsible for maintaining locations records and has access to the Locations bubble.
If you need access to Locations, please speak to your system administrator or raise an iHelp through Infusion.
What you’ll find in this guide
Navigating to Locations
Go to Business > Locations to open the application.
.png)
TIP
Navigation may vary depending on the permissions set in your security profile. For example, some will access Locations through the Business bubble, while others might go directly to Locations.
If no locations exist, you’ll see an ‘Add location’ button in the middle of the view. Select this button to start adding locations.
.png)
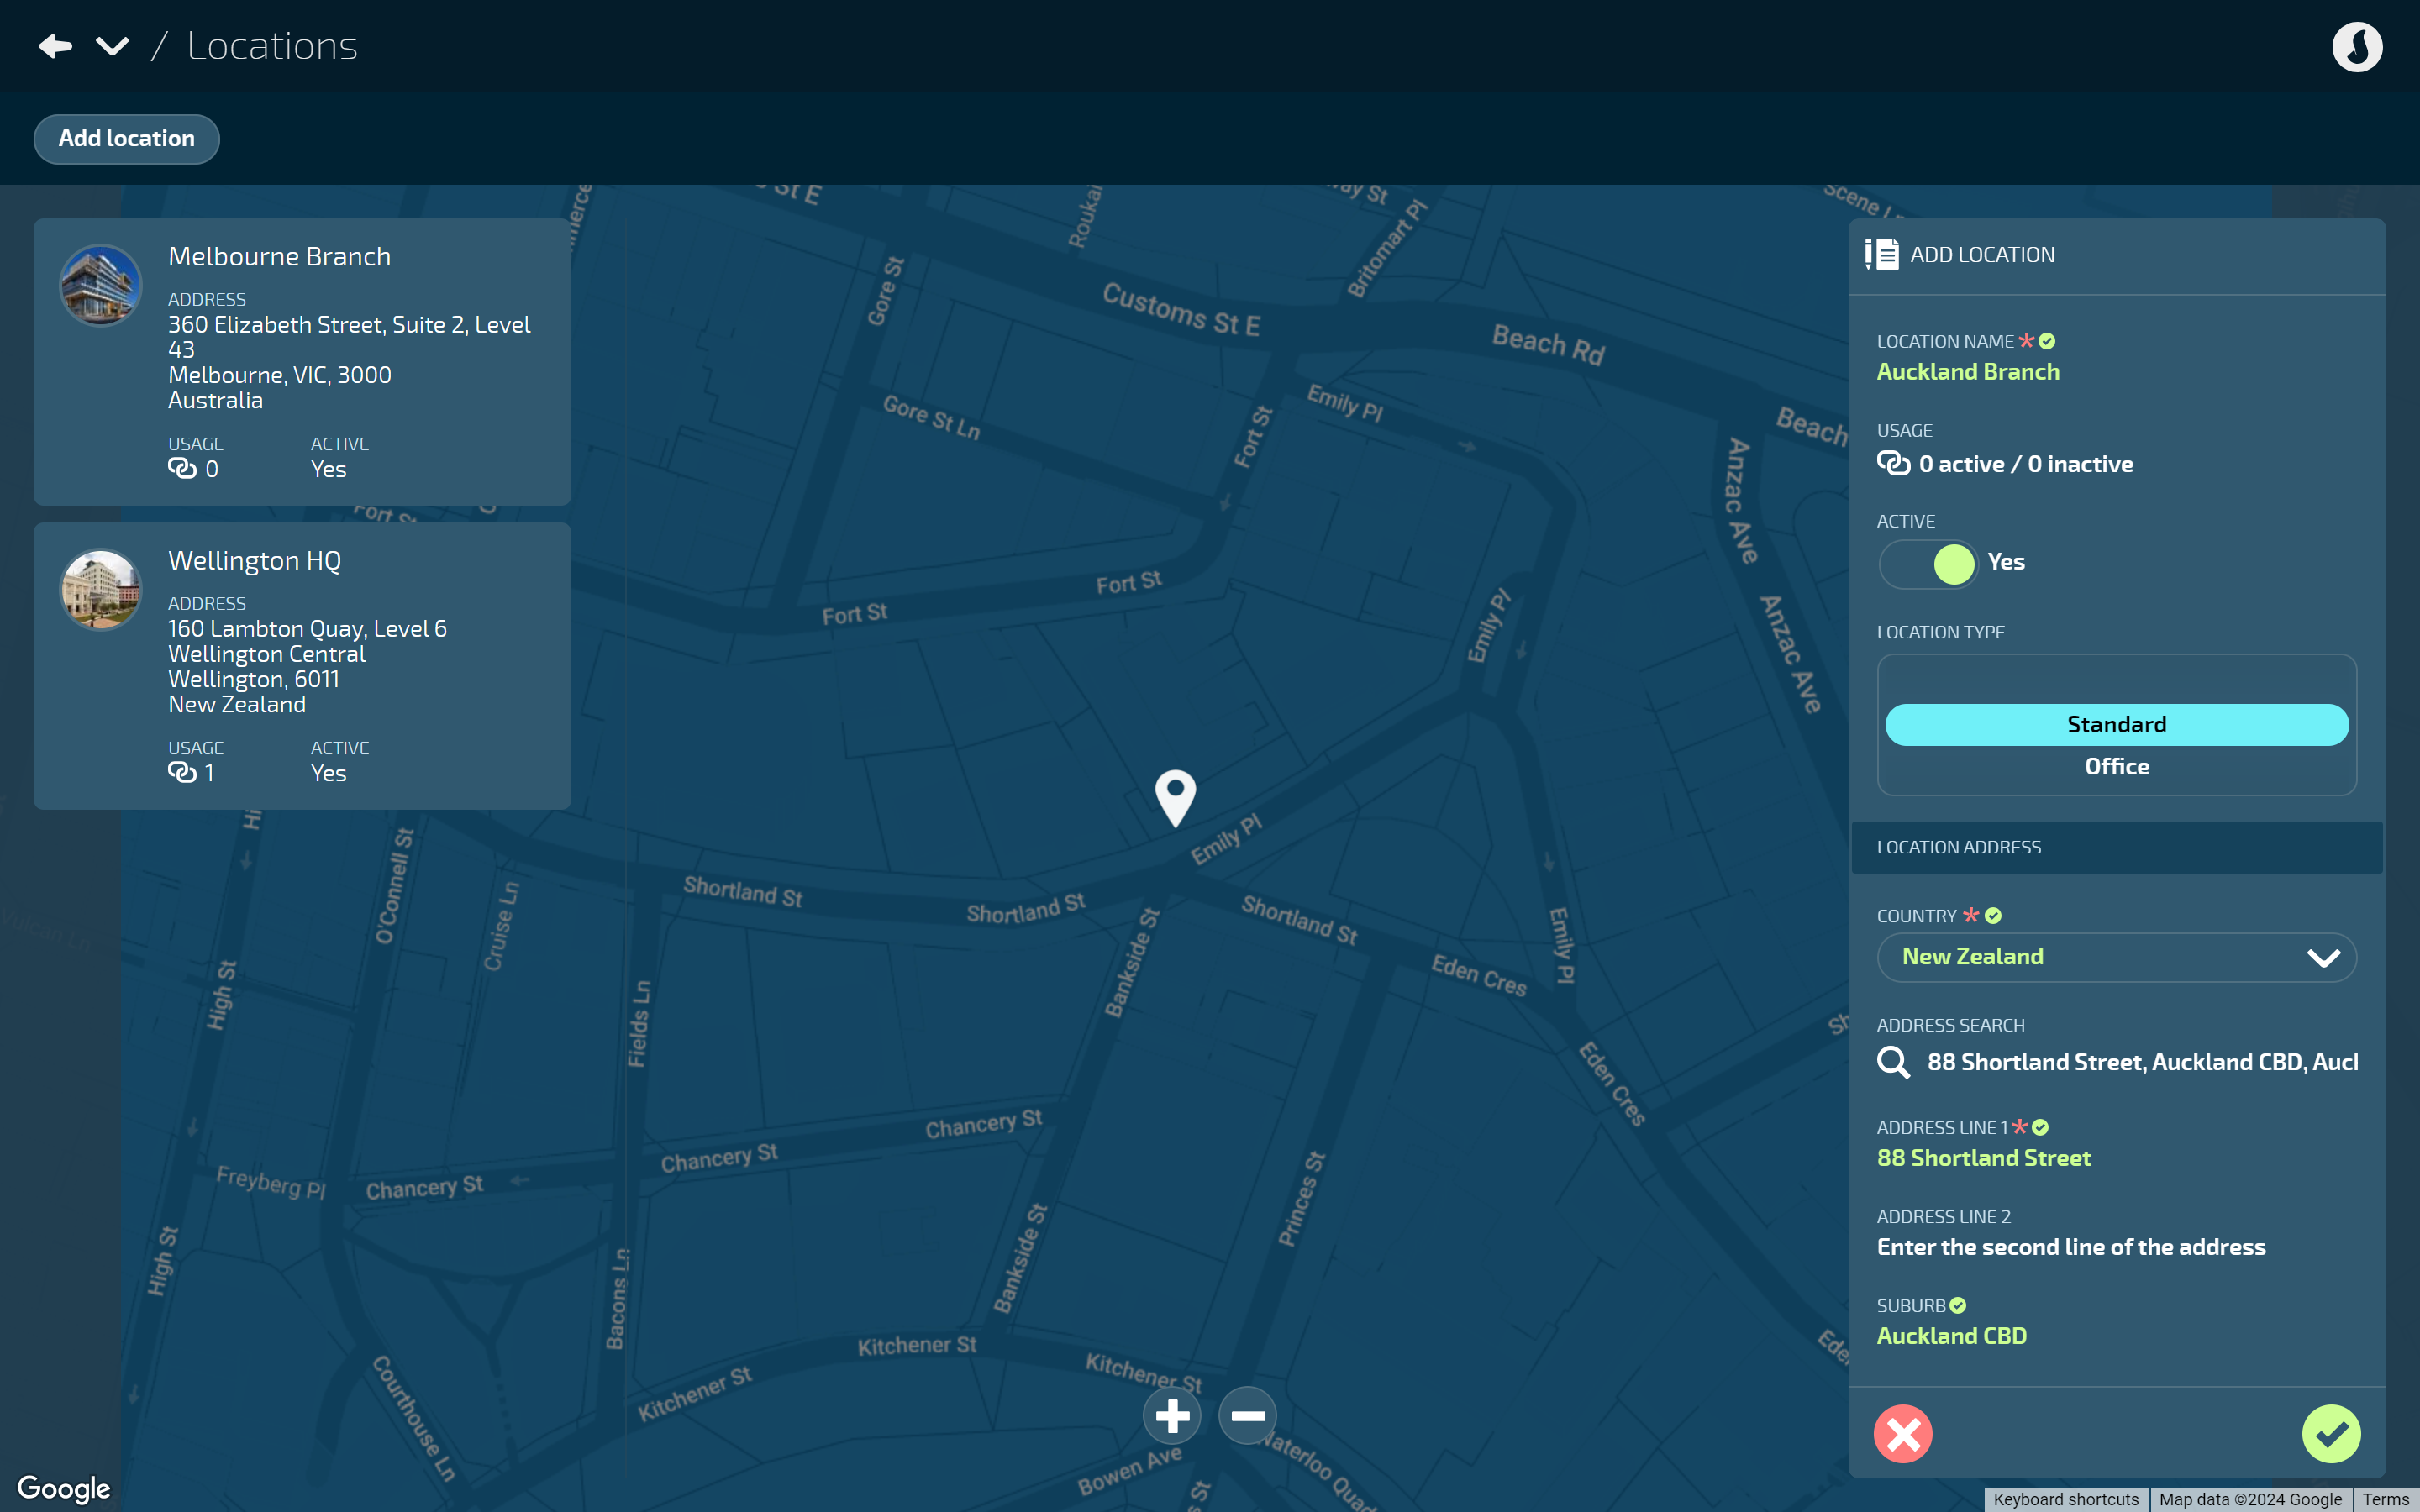
If locations are already added, they’ll appear on the left side of the map. The ‘Add location’ button will move to the top left corner.
.png)
The white pins on the map indicate their precise location. You can use the plus and minus buttons at the bottom of the view to zoom in and out of the map. Other than that, the map isn’t interactive. To view a location’s details, select the corresponding card on the left.
How to add a location

New Zealand based location
Go to Business > Locations.
Select Add location to open the ADD LOCATION panel.
Enter the LOCATION NAME.
Set ACTIVE to Yes or No.
Set to Yes to make the location visible and available to use in other areas of Jemini
Set to No to hide the location from other areas in Jemini until you're ready to activate it.
Select the LOCATION TYPE:
Standard
Office
Training
Other
TIP
You can choose the location types that work best for your organisation. If you have different types of locations—such as offices, warehouses, or sales rooms—you can use Standard, Office, and Other to categorise them. Locations with these types can be selected elsewhere in Jemini, such as Position Establishments and Occupancies.
Note that Training locations are exclusively for Upskilling Course Sessions. Training locations will only be available to select in Upskilling.
Under the LOCATION ADDRESS section, select 'New Zealand’ as the COUNTRY. Address fields will appear.
Add the address by:
Using the ADDRESS SEARCH.
Selecting Enter address manually and entering the details when the remaining address fields appear.
(Optional) Adjust the location pin position.
When you enter the address, a white pin will automatically appear on the map. If it’s positioned incorrectly, you can drag and drop the pin to the correct position on the map.
Select the PROVINCIAL HOLIDAY LOCATION.
Each province has its own set of public holidays. This setting determines which holidays apply to employees associated with this location based on their occupancy.
(Optional) Select Add photo to upload the LOCATION PHOTO (upload JPEG or PNG files).
Select the Green Tick Button to save and close the panel.
The location will be added to the list of locations on the left, and you'll see the location pin has been added to the map.
Australian based location
Go to Business > Locations.
Select Add location to open the ADD LOCATION panel.
Enter the LOCATION NAME.
Set ACTIVE to Yes or No.
Set to Yes to make the location visible and available to use in other areas of Jemini
Set to No to hide the location from other areas in Jemini until you're ready to activate it.
Select the LOCATION TYPE:
Standard
Office
Training
Other
TIP
You can choose the location types that work best for your organisation. If you have different types of locations—such as offices, warehouses, or sales rooms—you can use Standard, Office, and Other to categorise them. Locations with these types can be selected elsewhere in Jemini, such as Position Establishments and Occupancies.
Note that Training locations are exclusively for Upskilling Course Sessions. Training locations will only be available to select in Upskilling.
Under the LOCATION ADDRESS section, select ‘Australia' as the COUNTRY. Address fields will appear.
Add the address by:
Using the ADDRESS SEARCH.
Selecting Enter address manually and entering the details when the remaining address fields appear.
(Optional) Adjust the location pin position.
When you enter the address, a white pin will automatically appear on the map. If it’s positioned incorrectly, you can drag and drop the pin to the correct position on the map.
Select the LOCAL GOVERNMENT AREA.
Public holidays are determined by the state and territory governments. This setting determines which holidays apply to employees associated with this location based on their occupancy.
TIP for system administrators
Local Government Areas are configured in Business Core Tables.
(Optional) Select Add photo to upload the LOCATION PHOTO (upload JPEG or PNG files).
Select the Green Tick Button to save and close the panel.
The location will be added to the list of locations on the left, and you'll see the location pin has been added to the map.
How to edit a location
.png)
Go to Business > Locations.
Select the location card you want to edit. The LOCATION panel will open.
Make any necessary changes to the location details.
If the location is already in use elsewhere in Jemini, some fields will be greyed out and can't be modified. Check the USAGE indicator on the card to see if it’s in use.
Select the Green Tick Button to save and close the panel.
How to delete a location
TIP
You can only delete a location if it's not already in use elsewhere in Jemini. Check the USAGE indicator on the card to see if it’s in use.
Go to Business > Locations.
Select the location card you want to delete. The LOCATION panel will open.
Select the Delete Button.
Select Go ahead when the confirmation message appears, or select Go back if you’ve changed your mind.