Who can benefit from this guide?
Payroll staff who are responsible for running New Zealand pay cycles. For the Australian guide, refer to Intro to Pay Cycles (Australia only).
System Administrators: Open to view permission settings
For a user to successfully run a pay cycle in Jemini, they’ll need access granted for:
Payroll Processing permissions in Payroll:
Payroll Management application
Adhoc Pay Cycle records
Pay Cycle Processing
These permissions can be set in System > Security Profiles.
NOTE: If the user hasn't been given access to all employees and all payrolls in their user profile, you'll need to give them access to the the necessary payrolls from the PAYROLL ACCESS backpack. Find the PAYROLL ACCESS backpack in System > User Profiles, under the user profile’s Filter employee and Payroll Access settings.
If you need help, reach out to our support team: raise an iHelp through Infusion.
Understanding the pay cycle process from calculation to confirmation
The pay cycle process involves generating employee pay for each eligible employee within a given pay period for each payroll.
Once you've opened a pay cycle for a chosen pay period, you can process pay by following the three main steps in the pay cycle process:
Calculating the pay
Creating the direct credit file
Confirming that the bank has released the direct credit file

During the process, any errors or warnings in calculations may need to be resolved. Once the pay cycle is complete, various post-processing activities become available, such as downloading payslips, viewing and sending the employment information file, and running pay reports.
How to open a pay cycle
Go to PAY > PAYROLL MANAGEMENT.
In Controls:
Select the PAYROLL you need to process.
Select the PAY PERIOD you need to process.
Select the pay cycle card to open the Pay Cycle view.
TIP
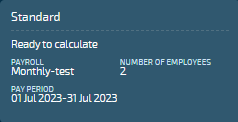
The Pay Cycle card will show the following details:
Payroll type (for example, Standard)
Calculation status (for example, Ready to calculate or Calculated)
Payroll name
Number of employees within the payroll
Pay period dates
How to process pay
Step one: Calculating the pay
Once you've opened the Pay Cycle view, you can calculate the pay.
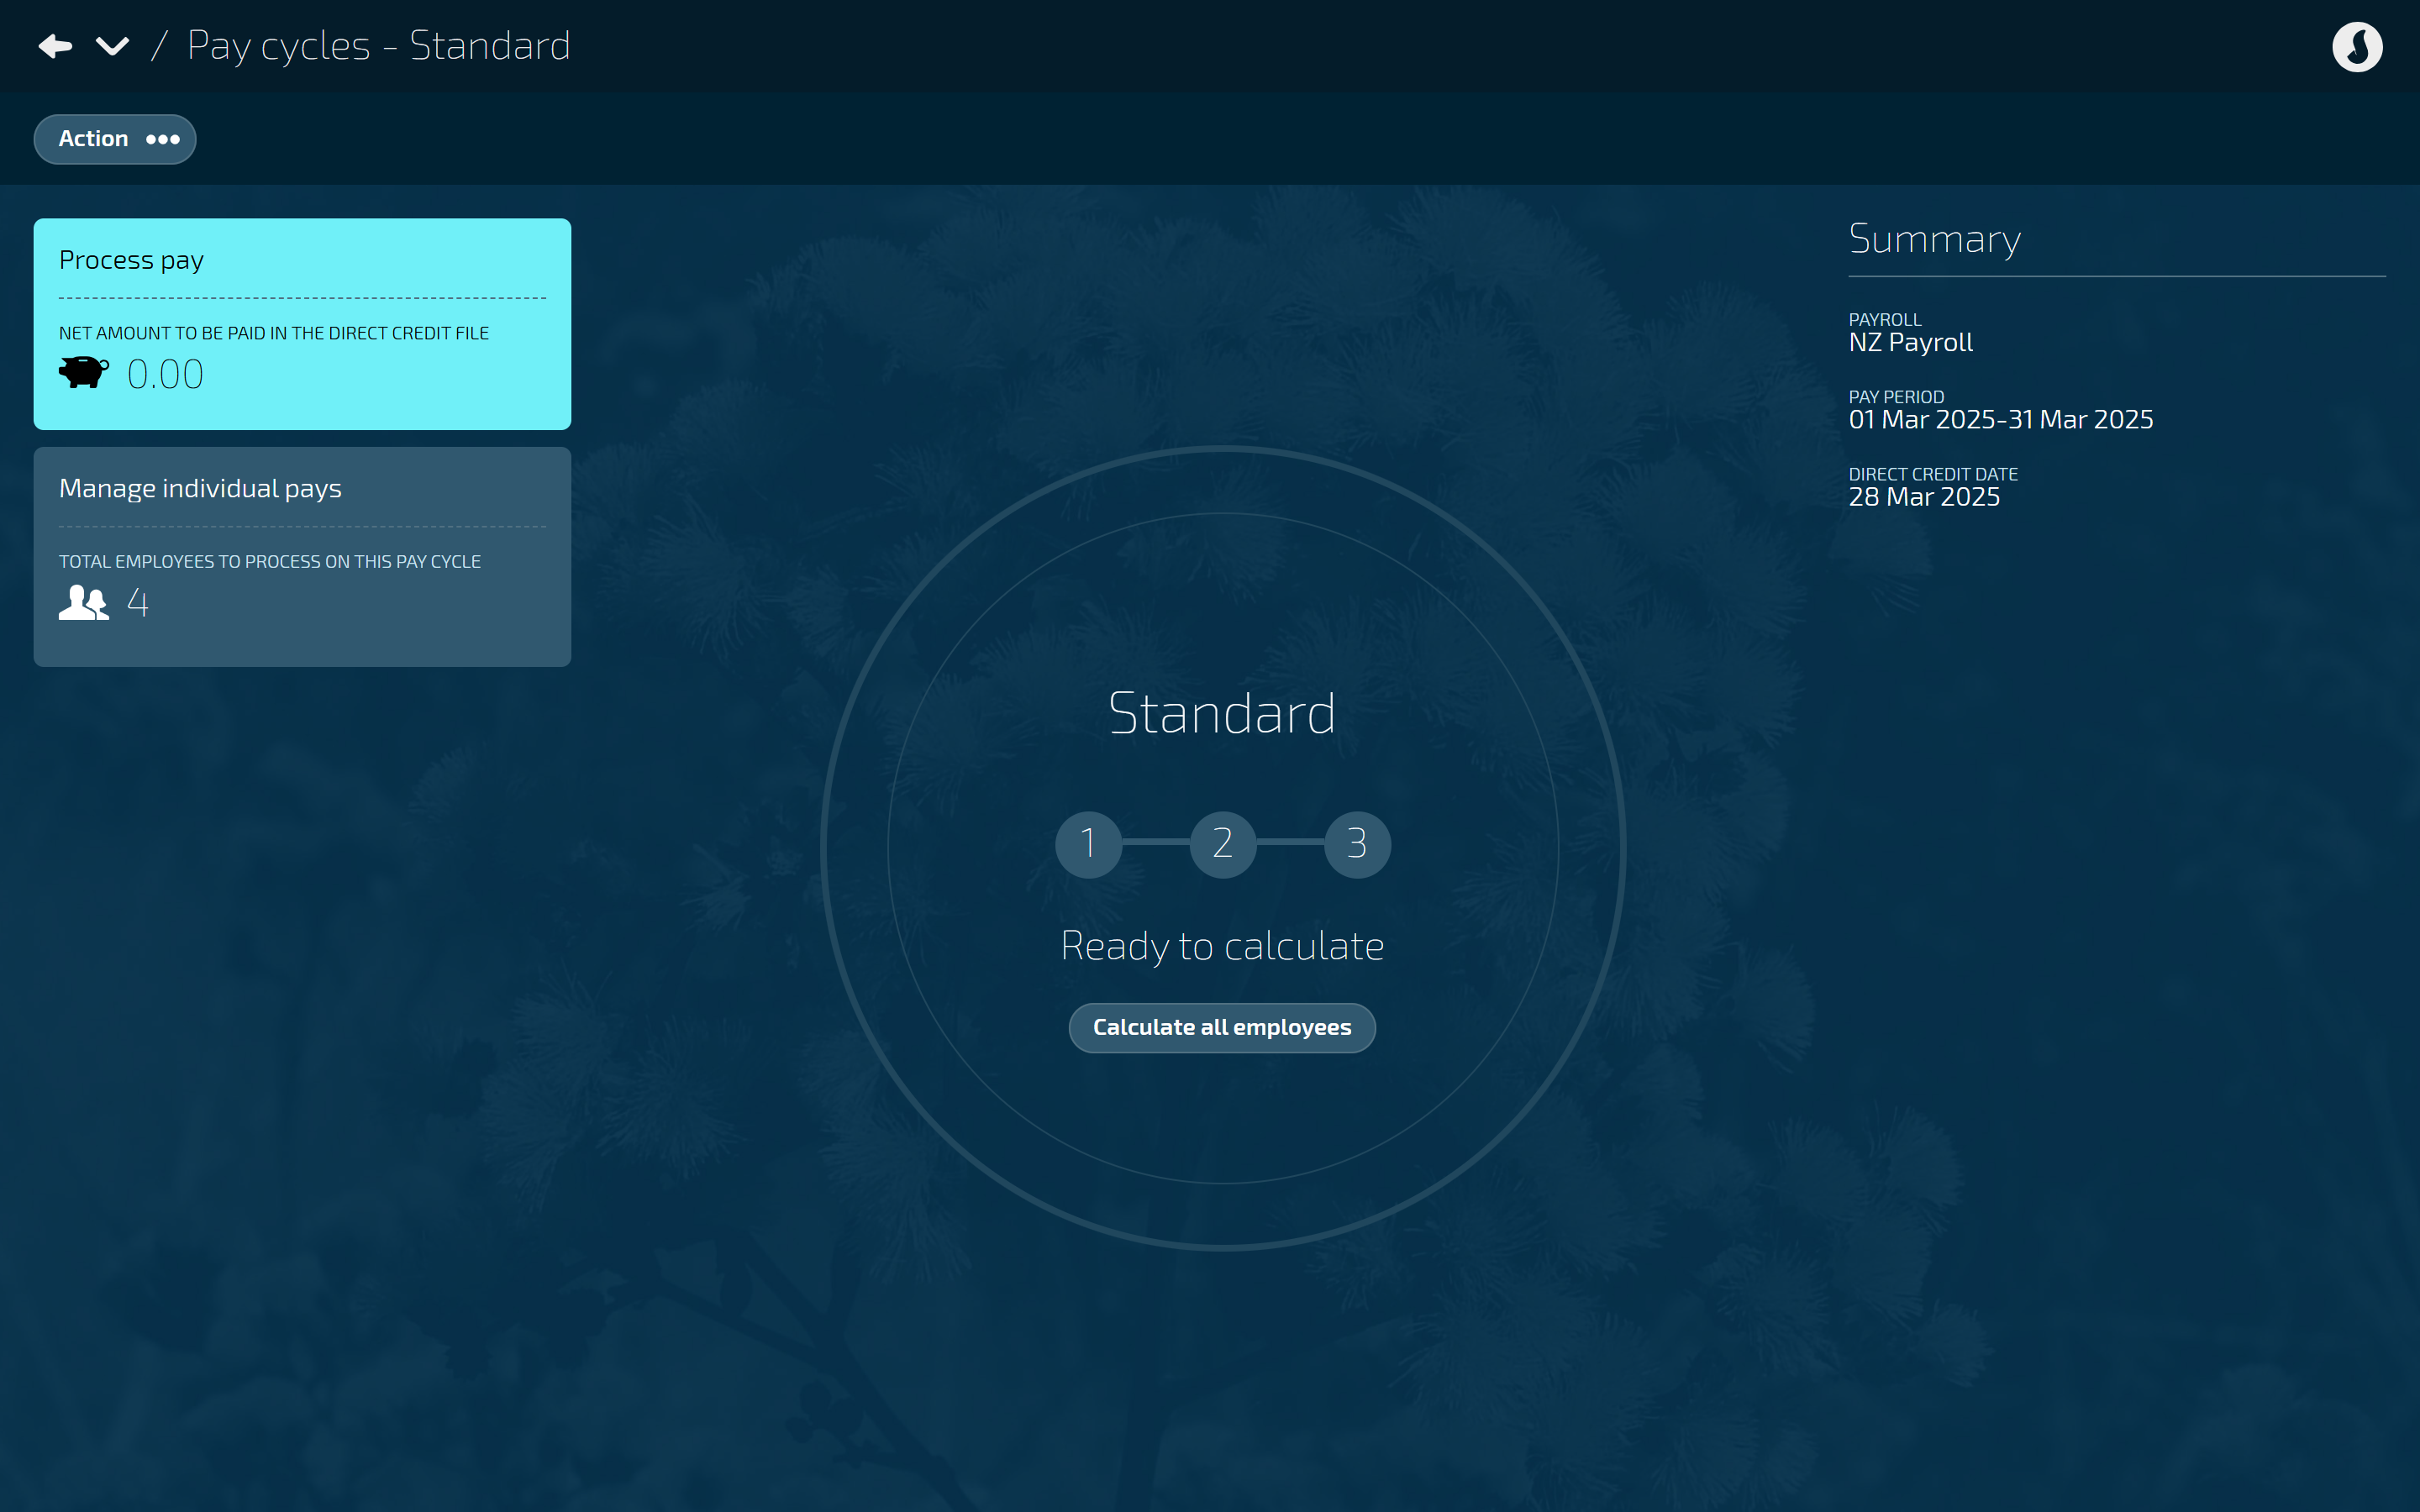
Select Calculate all employees.
If the pay cycle calculates correctly, the circle will turn green, and you can move on to Step two: Creating the direct credit file.
However, if the pay cycle calculates errors and warnings, the circle in the centre will turn red, and you'll need to follow the Resolve errors and warnings steps below.
Resolve errors and warnings:When the pay cycle has calculated errors and warnings, you'll see the number of employees processed with errors and warnings in the Manage individual pays section on the left.
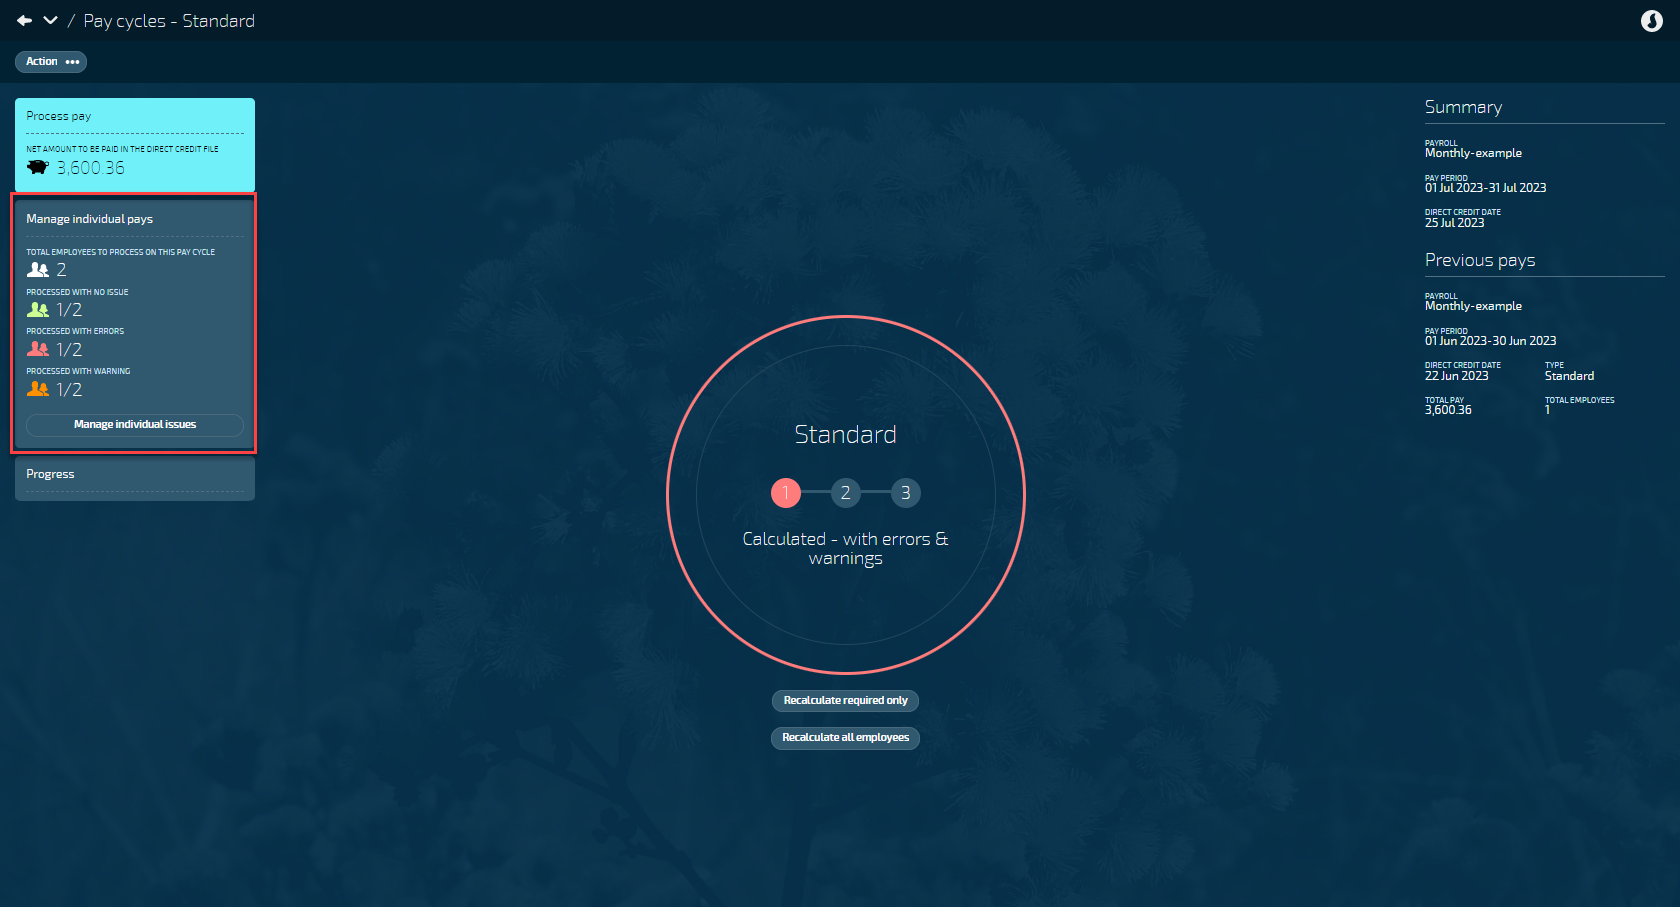
Select Manage individual issues to open the Errors and warnings manager. The errors will be marked in red, and the warnings will be marked in orange.

You can either acknowledge the warnings within the Errors and warnings manager or go to each employee's Pay Mode to resolve them. Errors must be resolved on the employee record or in Pay Mode, depending on the error details. Learn how to resolve errors in Pay Mode in the Intro to Pay Mode guide.
Once you've acknowledged or resolved the errors or warnings, you can move on to Step two: Creating the direct credit file.
Step two: Creating the direct credit file
The direct credit file holds all the information the bank requires to pay your employees.
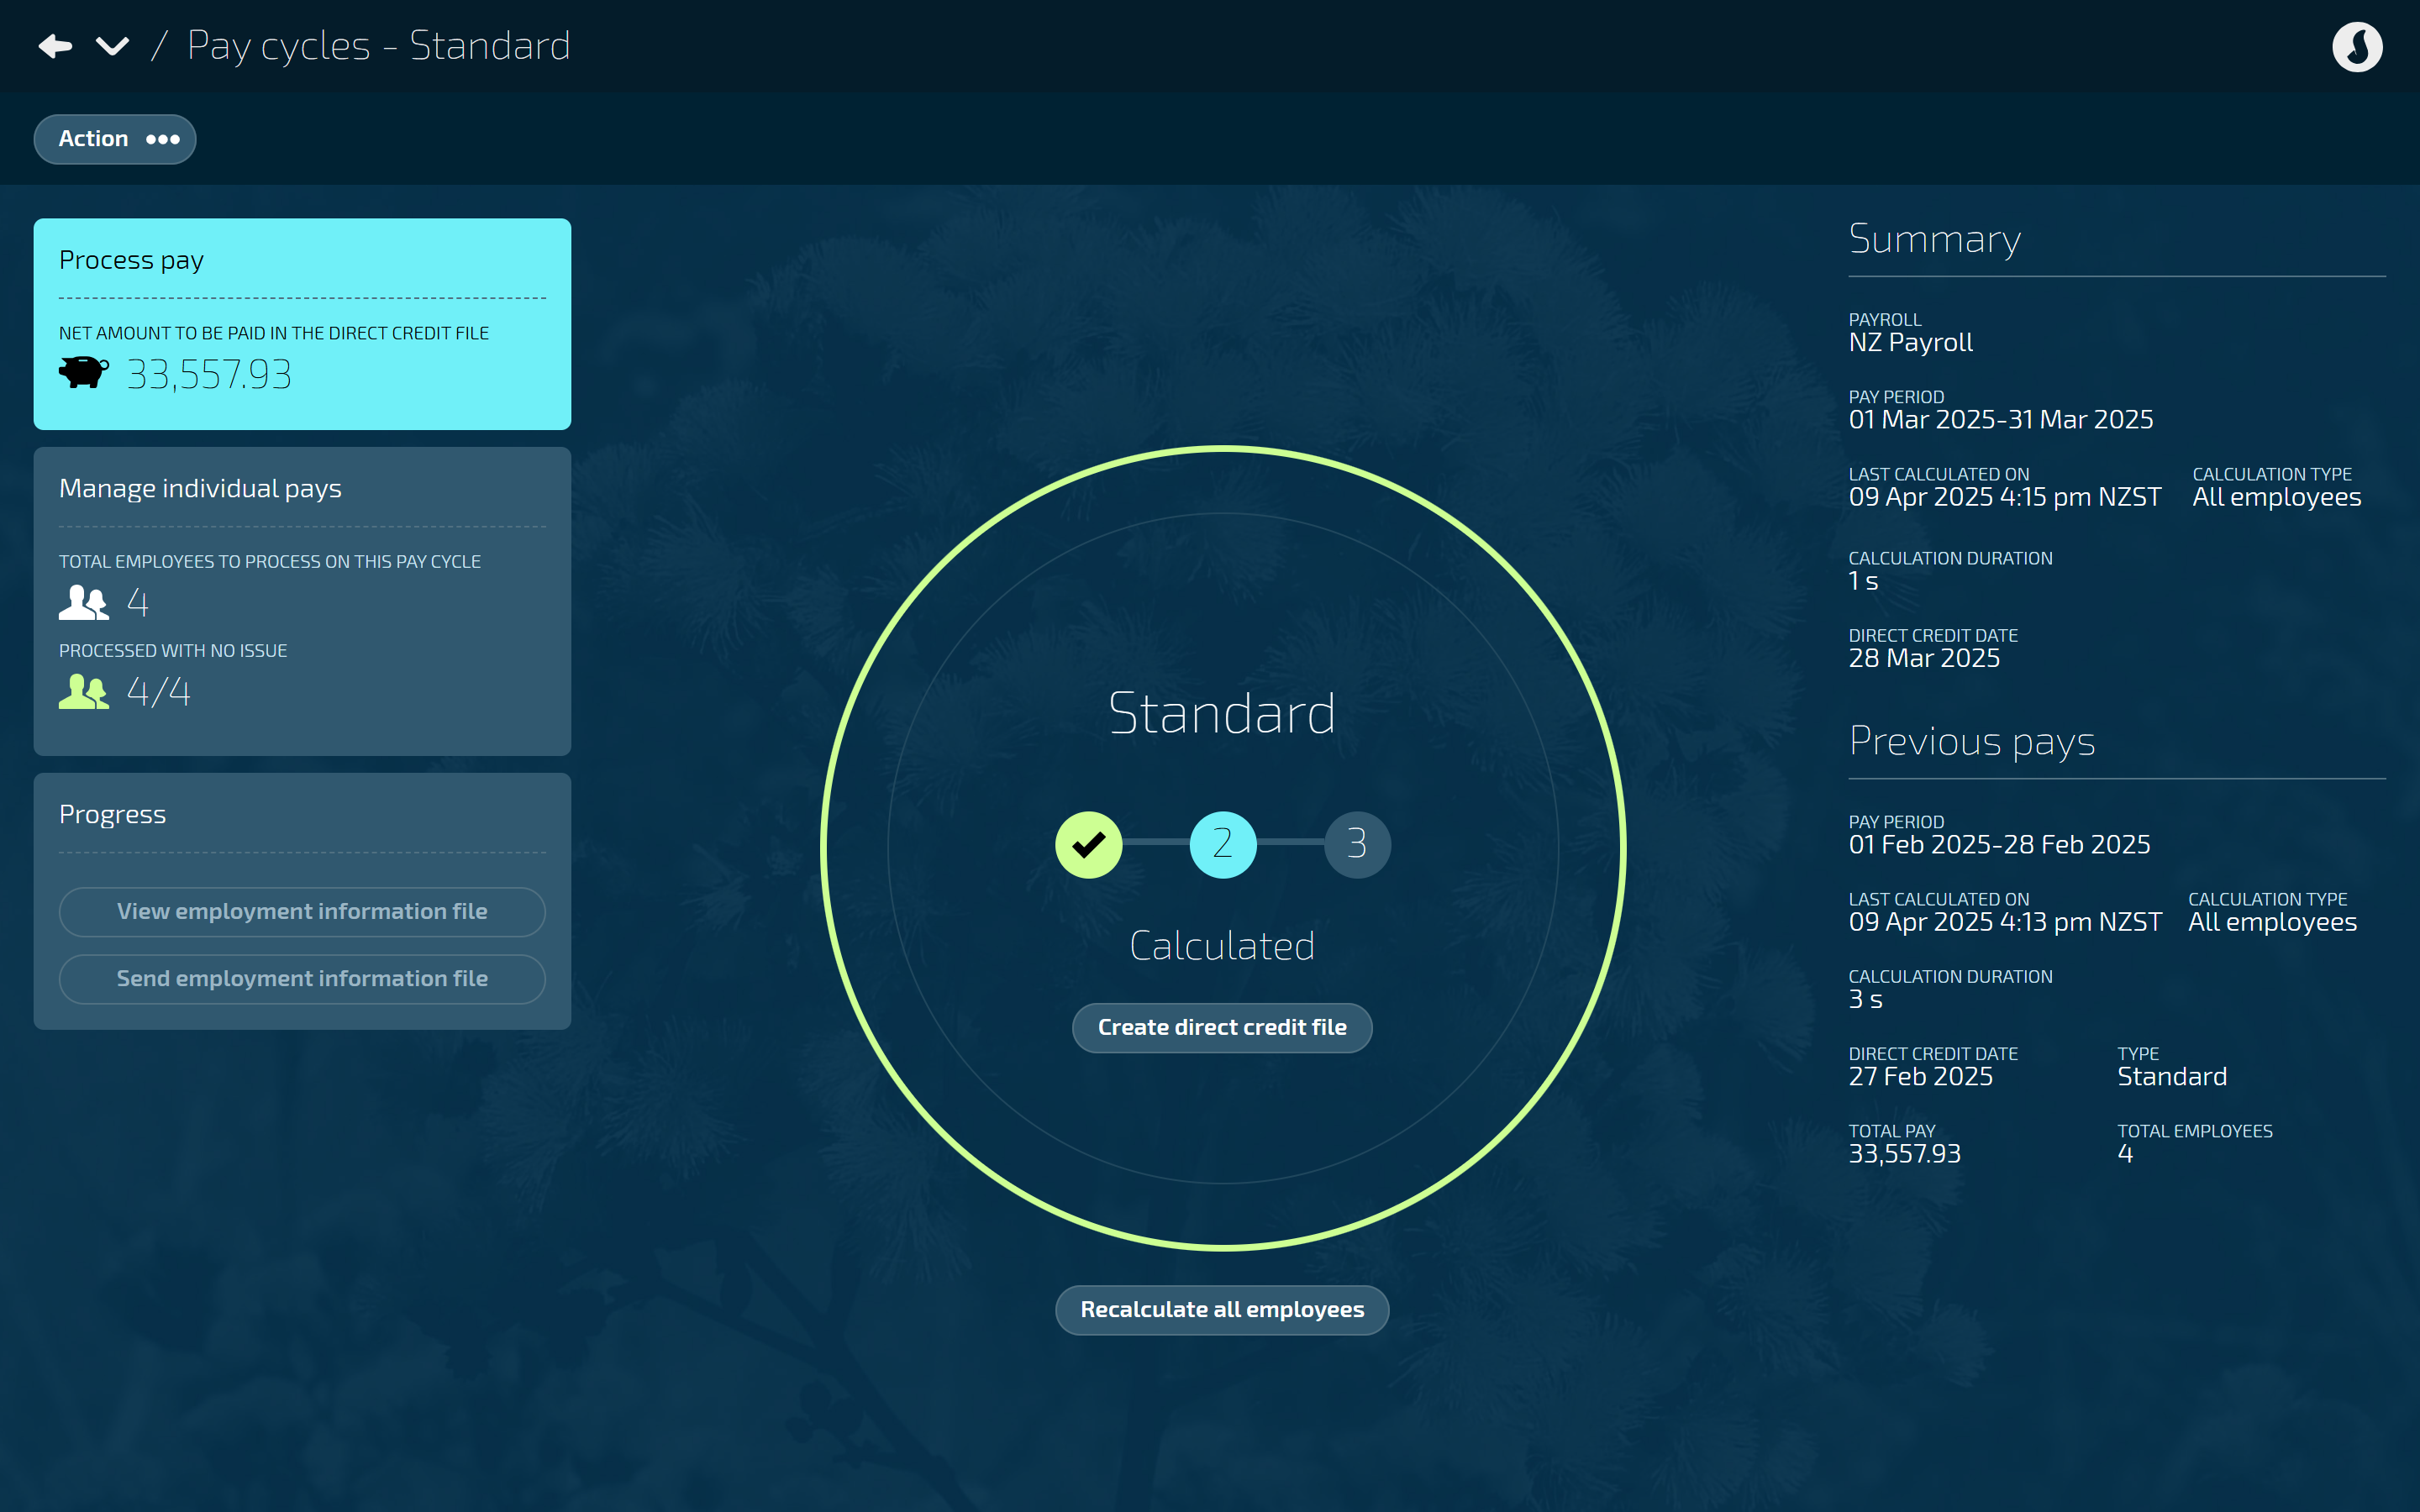
Select Create the direct credit file.
TIP
Once the direct credit file has been created, you can't add or change any transactions in the pay period, otherwise, the direct credit file won't include the latest changes and will be inaccurate.
The Add transaction button in employee Pay Mode will be locked.
If you need to make changes, you'll need to recalculate the pay. This will unlock the pay period and allow you to add more transactions. Once the changes are made, return to Pay Cycles and recalculate the pay again (select Recalculate all employees).
In the Progress section, select Download direct credit file to download the CSV file to your computer.
TIP
The direct credit file format will be created based on the organisation's legal entity settings. Each bank has a different file format.
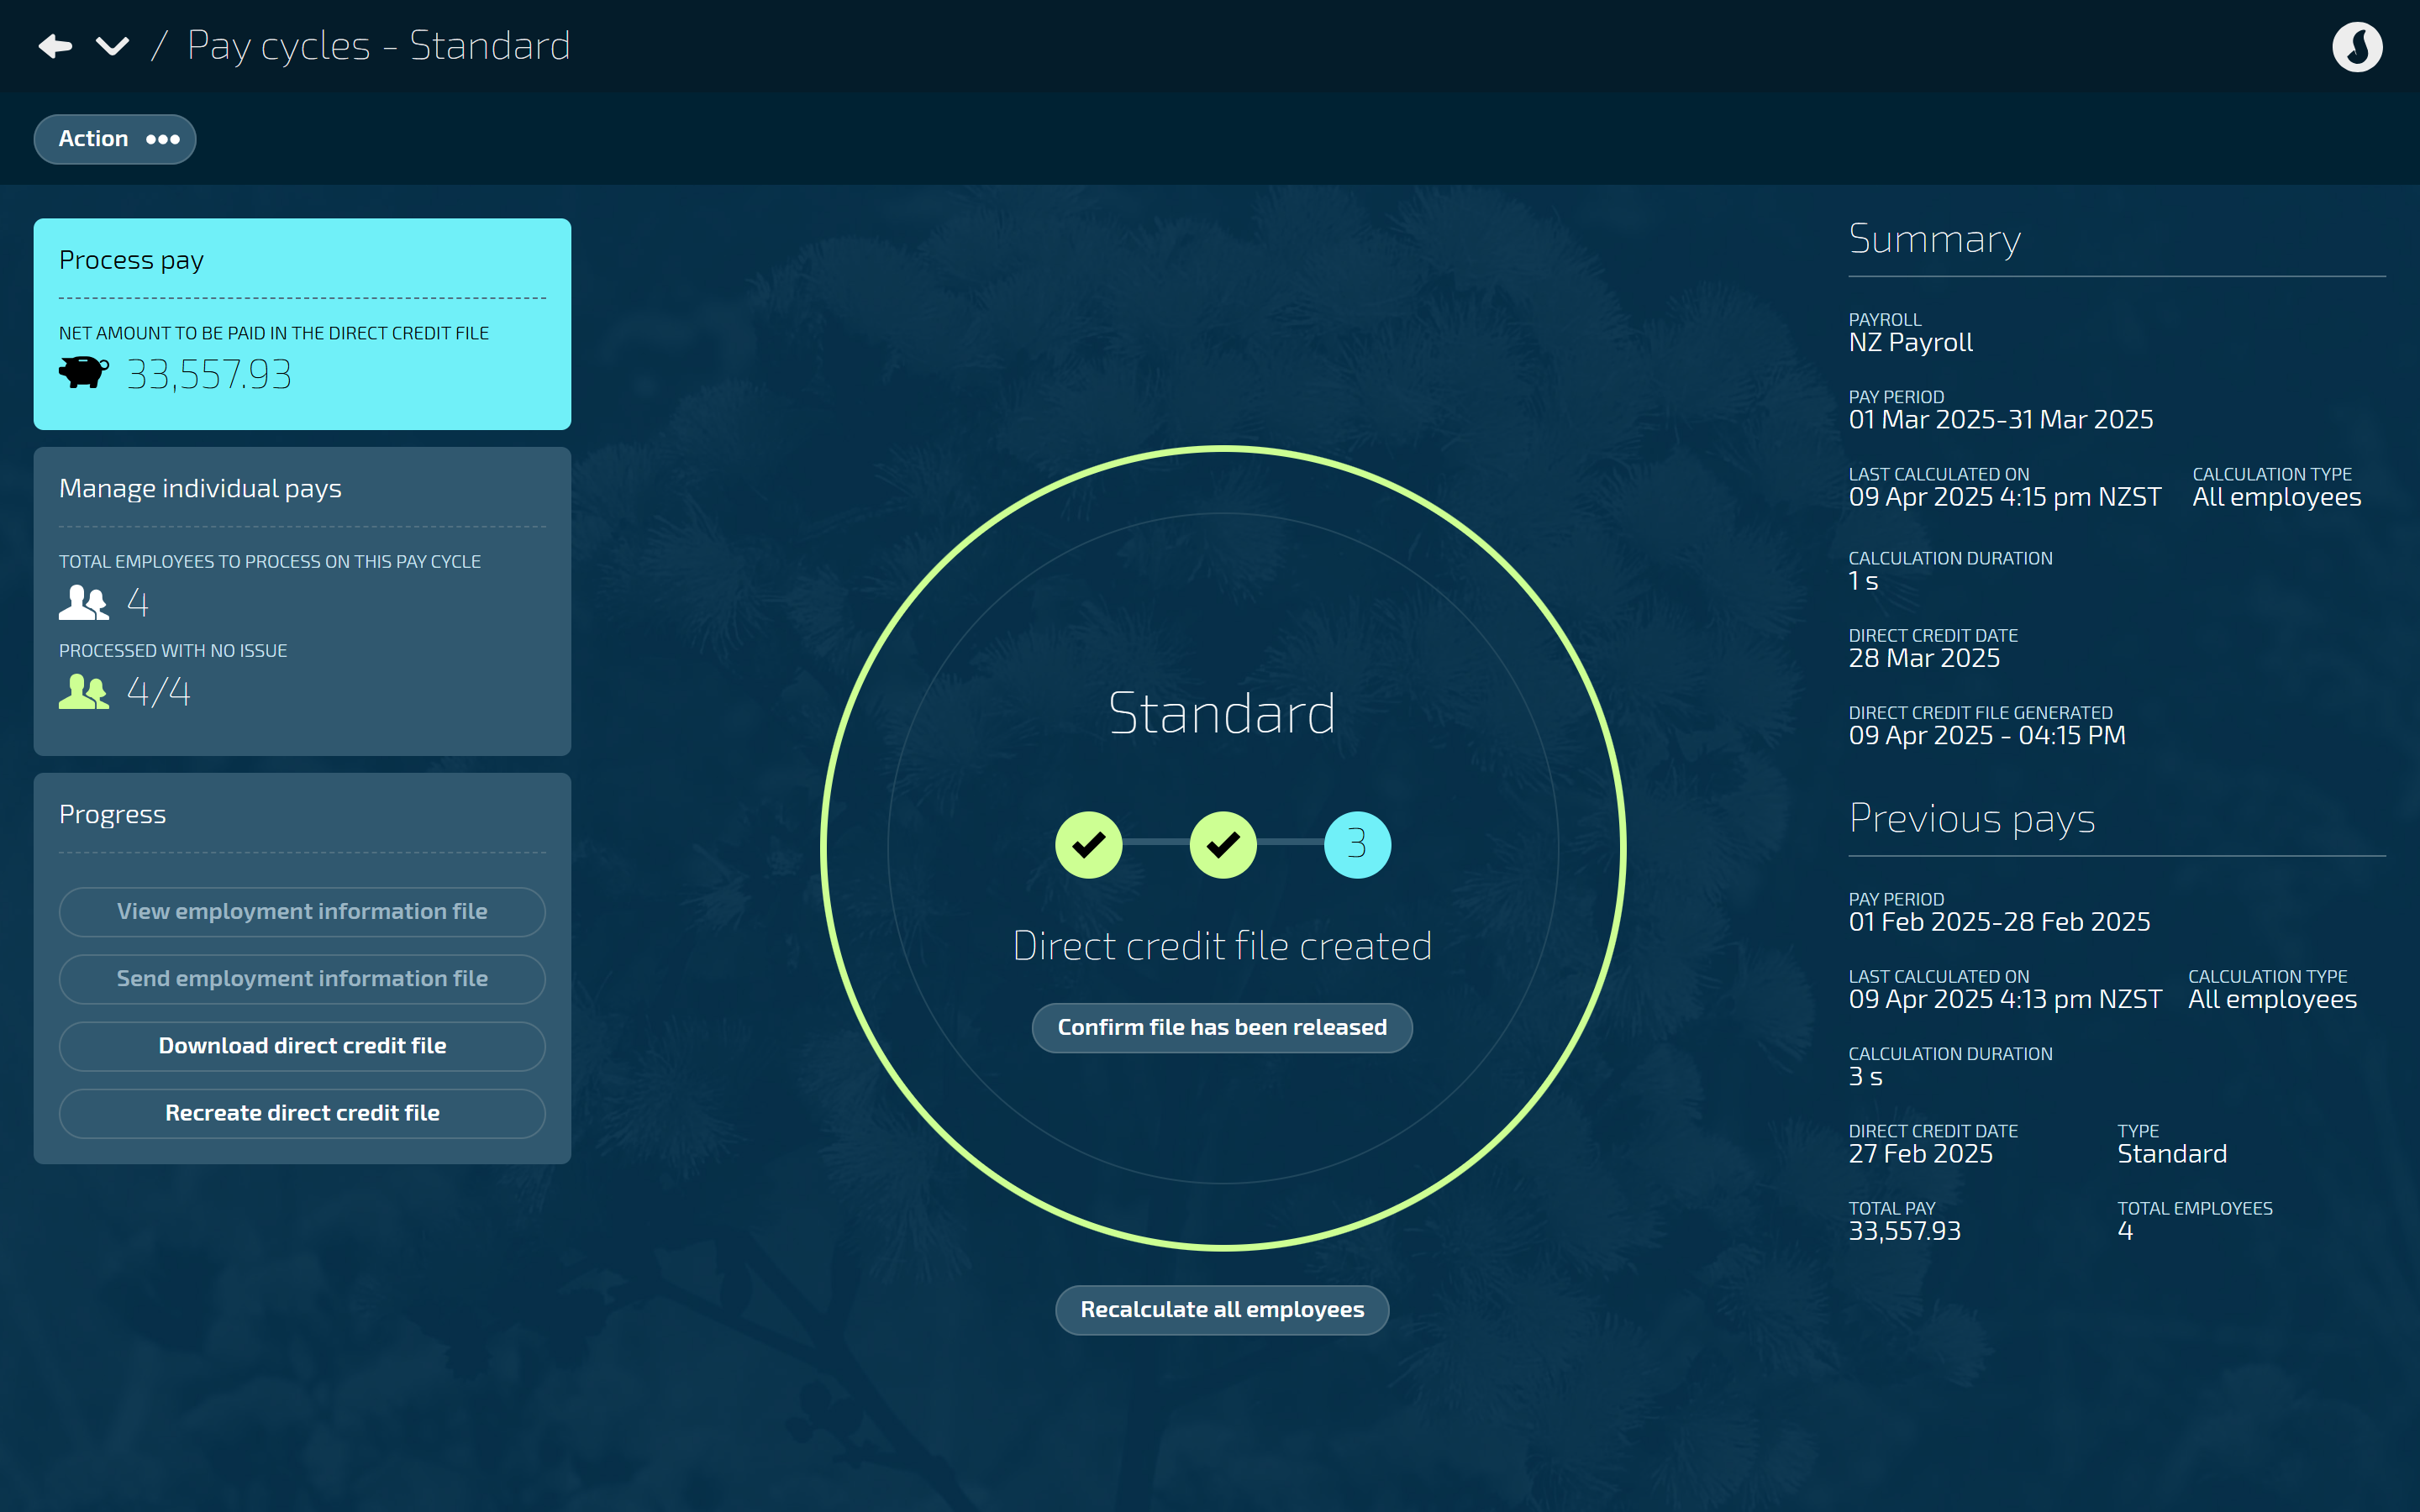
Send the direct credit file to your bank.
Step three: Confirmation that the direct credit file has been released
Once you know that the bank has released the direct credit file, you must go back into Jemini to complete the Pay Cycle process.
Select Confirm file has been released.
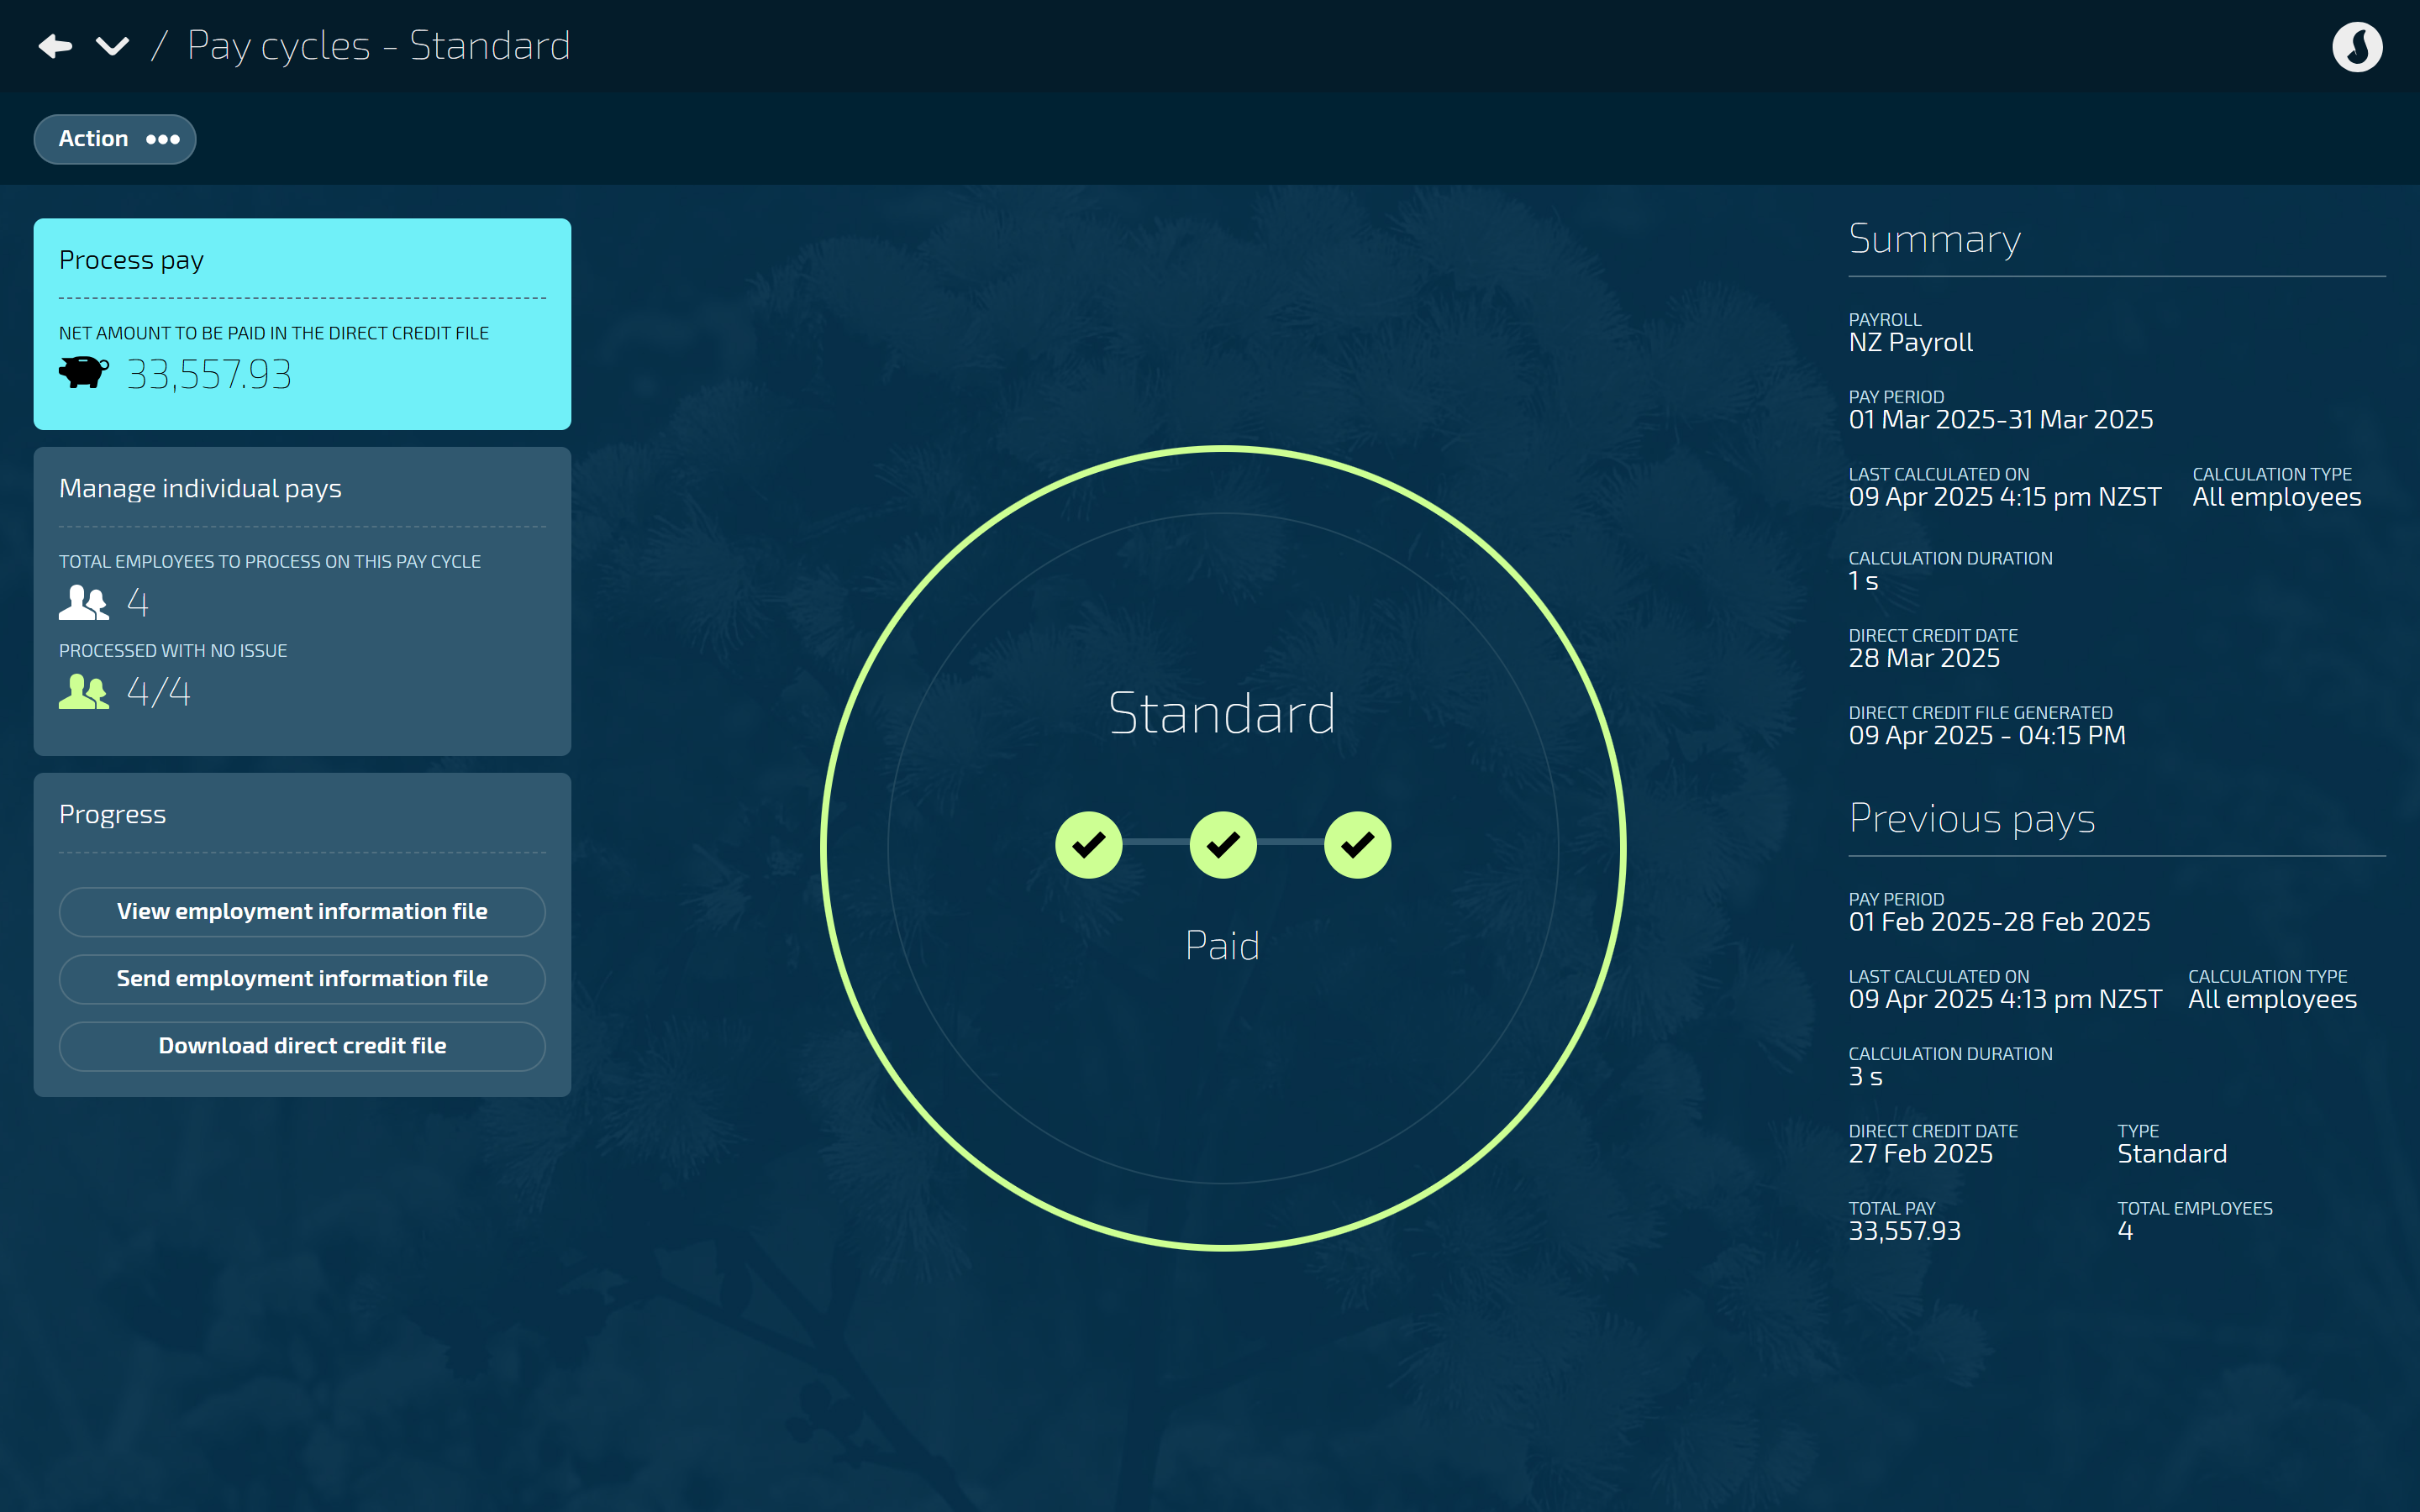
After the pay cycle is complete
Once the pay cycle is complete, you'll be able to:
View the employment information file
When you select the View employment information file button, an XML file will be downloaded to your computer. The downloadable file is a preview. The employment information file will be recreated when sending the file.
Send the employment information file
When you select the Send employment information file button, your browser will open on the appropriate government webpage to submit the employment information file.
TIP
For a New Zealand payroll, data will be sent to the Inland Revenue Department (IRD) when you select Send employment information file.
For an Australian payroll, data will be sent to the Australian Taxation Office (ATO).
Download the direct credit file
When you select the Download the direct credit file button, a copy of the direct credit file will download to your computer so that you can keep it for your records.
Download payslips
A Download Payslip button will appear in employee Pay Modes. Employees can download their payslip from Your Jemini > Payslips
Run pay reports
You may need to run the pay reports depending on your organisation's requirements. There are many different reports related to pay in Pay > Reporting. You can run different ones depending on your audit or accounting department requirements.
For example:
Employee Pay Calculation (paginated and non-paginated)
Employee Pay Details
Employee Pay Rates
Employee Pay Summary
Pay Audit Report
...and so on.
TIP
If you want to learn more about pay reports, feel free to raise an iHelp through Infusion. A Jemini consultant will be able to introduce you to the various reports.