Who can benefit from this guide?
Payroll staff who have access to Pay Mode and are responsible for checking and updating an employee’s pay.
Use Pay Mode to manage an employee’s pay within a pay period
Manually add, edit or delete transactions in an employee's pay.
Check automatically generated transactions, such as the employee’s salary or hourly rate, tax, leave, and superannuation (including KiwiSaver for New Zealand employees).
Make sure an employee's final pay is correct at termination.
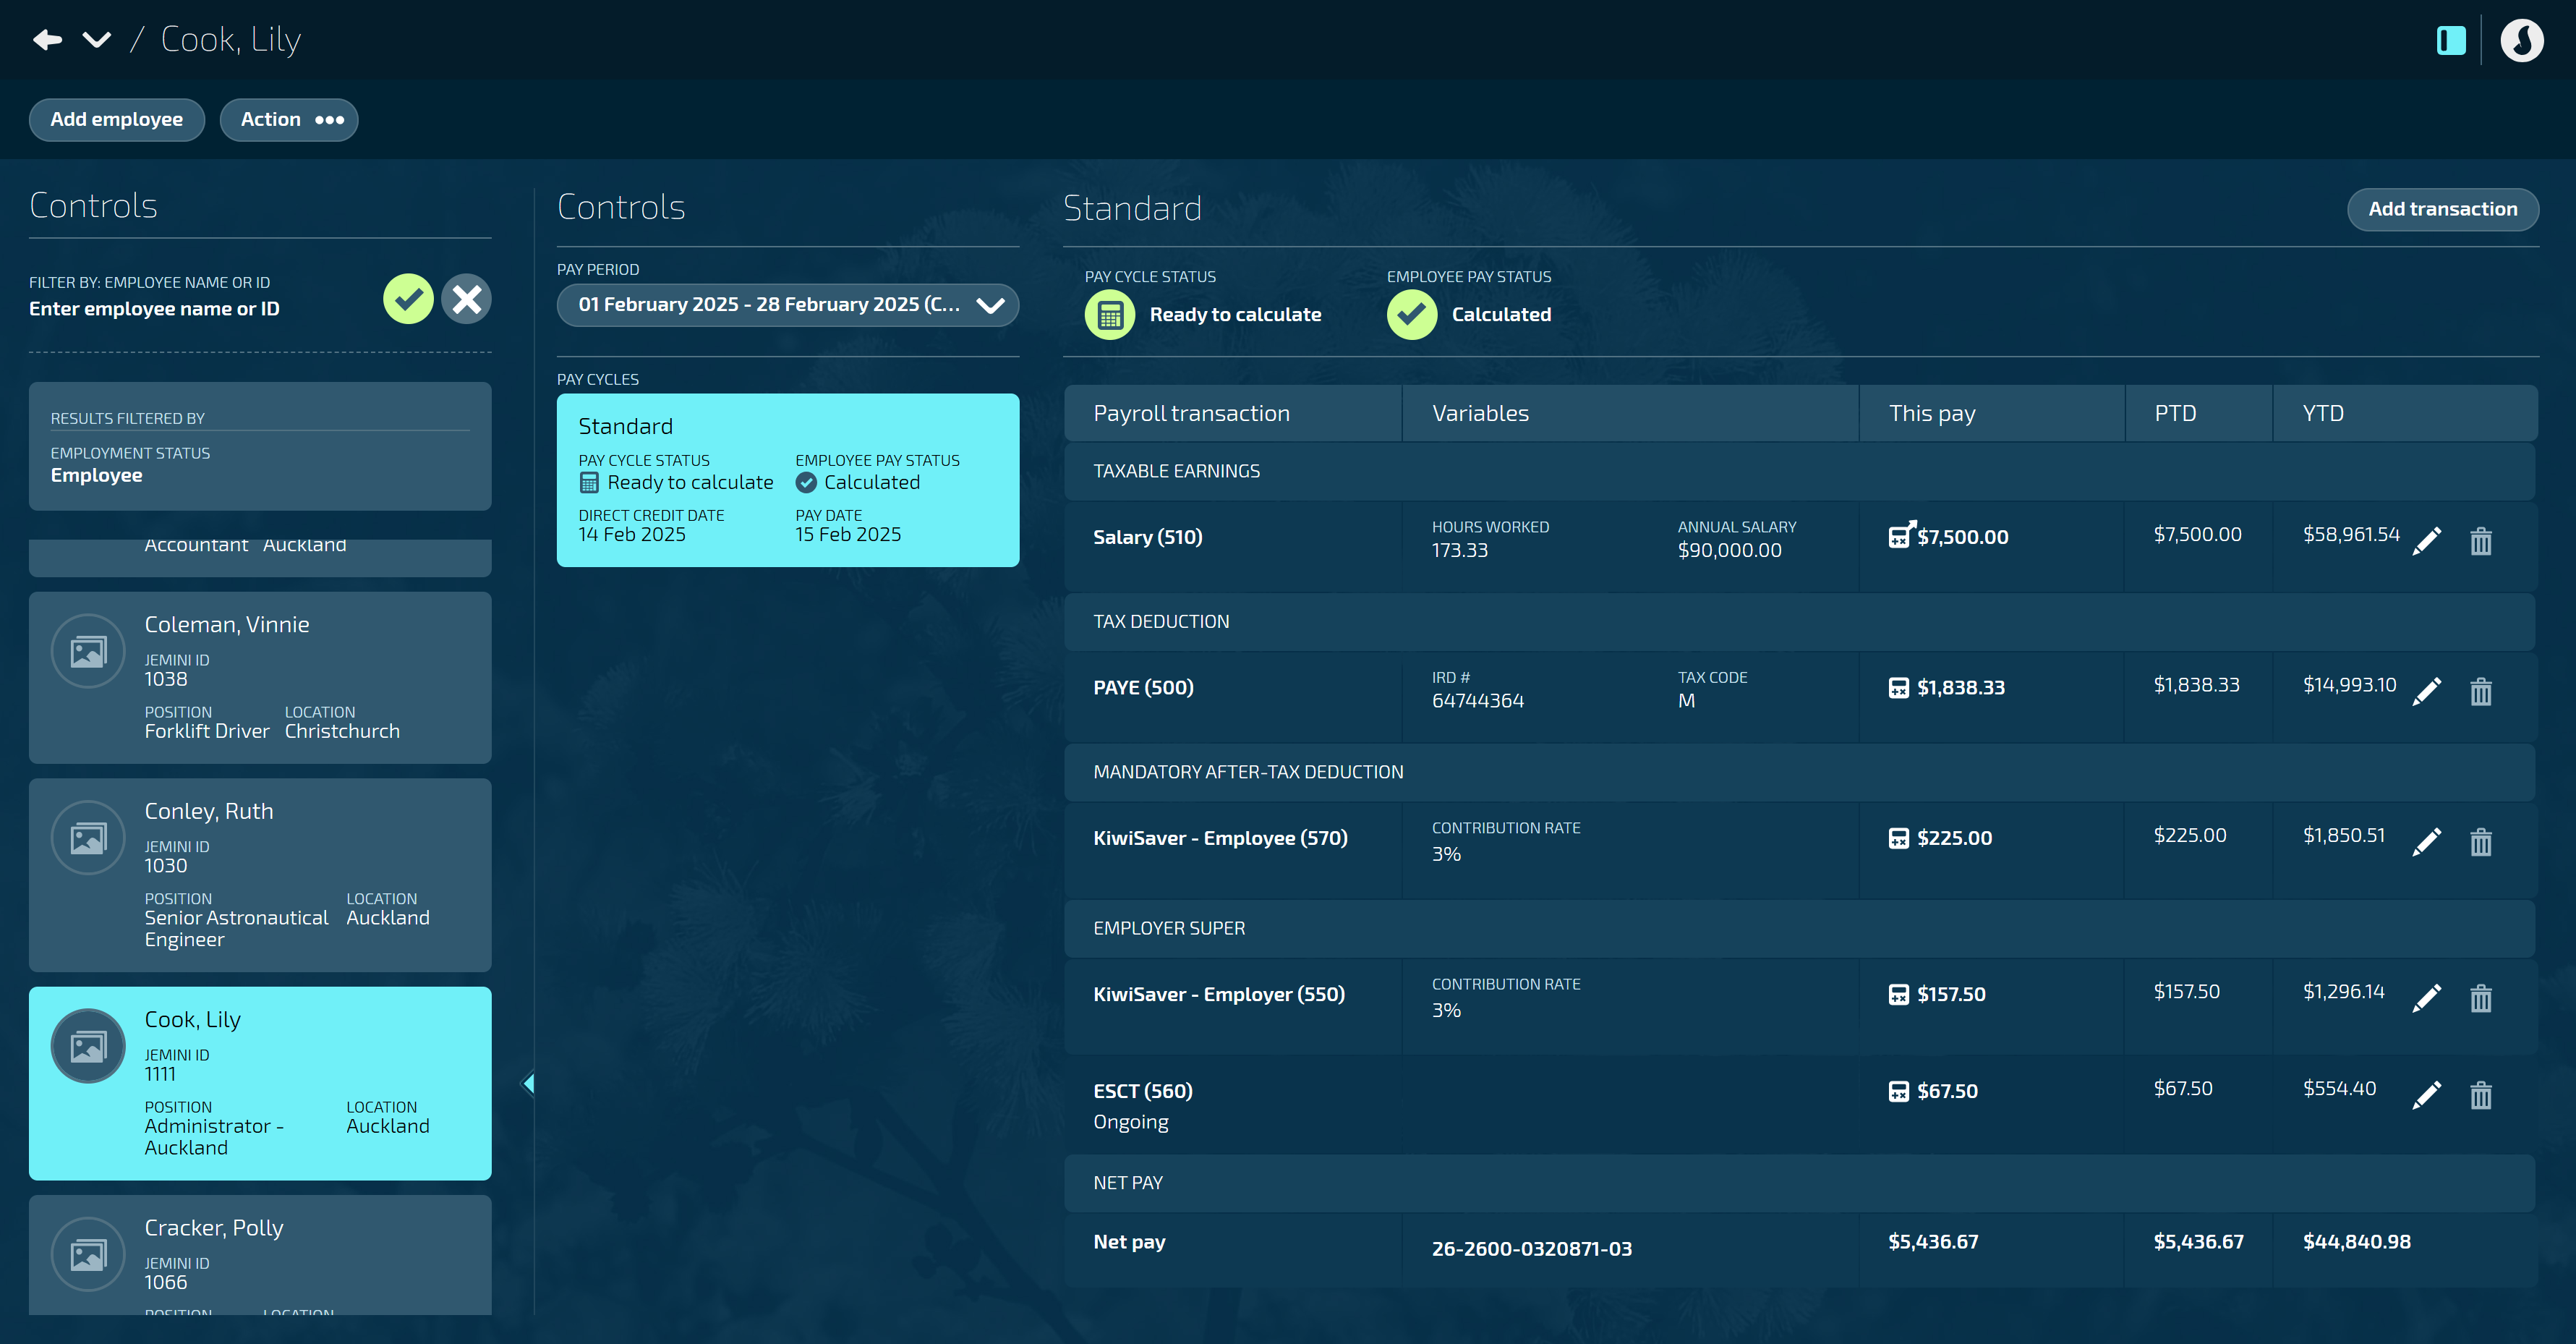
How to add a transaction
![]()
Open the employee's Pay Mode:
Go to People > Employees.
Select the employee you need to edit.
Go to Action > Pay Mode.
Under Controls, select the PAY PERIOD and PAY CYCLE you want to edit.
The current pay period and pay cycle are the default selection.
Select Add Transaction to open the ADD PAYROLL TRANSACTION panel.
Select a payroll transaction to open the PAYROLL TRANSACTIONS backpack.
Select a payroll transaction from the list.
Use the search function or filter by transaction type to narrow down the list.
Once you’ve made your selection, new settings will appear in the ADD PAYROLL TRANSACTION panel. These settings are based on the transaction types and settings applied within Payroll Transaction Configuration.
(Leave plan transaction types only) Set IS CASH OUT to Yes or No.
This option only applies to Leave Payment transaction types.
Default is No. This applies if the employee has taken their leave as time off.
Set to Yes for the employee to receive payment for their leave instead of taking time off.
Set ONGOING to Yes or No.
If set to Yes, the transaction will be repeated automatically in each pay cycle from the date you set the transaction to start.
If set to No, the transaction will only apply to the pay cycle you have open.
Enter the START DATE.
The date will default to the start of the pay period.
Enter the END DATE.
The date will default to the end of the pay period unless ONGOING is set to Yes.
The end date is optional if the transaction is ongoing.
The next steps depend on the calculation type applied was applied during the transaction configuration.
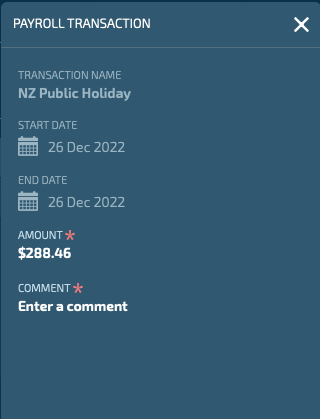
If transaction calculation type is Fixed value:
Enter the QUANTITY TO MULTIPLY AMOUNT BY.
Enter the AMOUNT.
If transaction calculation type is Calculation rule:
CALCULATION RULE will display the rule that was applied during the transaction configuration.
You may have other steps to complete based on this rule.
If transaction calculation type is Rate code:
CALCULATION RULE will display ‘Rate Code’ in grey.
RATE CODE will display the code that was applied was applied during the transaction configuration. You can change this by selecting ‘x’ and choosing another rate code if needed.
Enter the QUANTITY TO MULTIPLY AMOUNT BY.
If transaction calculation type is Range table:
RANGE TABLE will display the table that was applied to the transaction during configuration.
No other action is needed.
(Leave payment transaction types only) Select a leave plan from the LEAVE PLANS backpack.
(Leave payment transaction types only) Enter the number of leave hours for the first day.
(Leave payment transaction types only) (Optional) Enter the number of leave hours for the last day.
(Optional) Select Costing type to expand the COSTING TYPE section if required.
Select Add costing.
Enter the costing NAME.
Select cost code for each available costing type as needed.
If there are no available options, it means costing codes are not set up. These can be set up in PAY > COSTING.
Add more costings if required.
If you add more than one costing, a costings percentage bar will appear for each costing. You can adjust this if required.
Select the Circled tick icon to close that section.
(Taxable earning transaction types only) Set ADD TO DAYS WORKED to Yes or No.
Default is No. This applies if the employee didn’t work extra days during the pay period.
Set to Yes if the employee worked an extra day during the pay period. This transaction will be used in the ADP calculation.
If set to Yes, enter the NUMBER OF DAYS TO ADD TO DAYS WORKED.
(Australian payroll only) Change the INCOME STREAM TYPE if required.
The income stream will default to what’s set in the employee’s Pay Rate.
If the transaction you’re adding has a different income stream to the employee’s default set in Pay Rate, you can change it here.
Select the Green Tick Button to save and close the panel.
How to edit a transaction
![]()
Open the employee's Pay Mode:
Go to People > Employees.
Select the employee you need to edit.
Go to Action > Pay Mode.
Under Controls, select the PAY PERIOD and PAY CYCLE you want to edit.
The current pay period and pay cycle are the default selection.
Find the transaction you want to edit, then select the Edit icon in that row. This will open the PAYROLL TRANSACTION panel.
Jemini has three options for editing a transaction, which is different from typical payroll software functionality. You can:
Override the amount:
Available on all transactions.
Enter a new amount and a comment explaining the change.
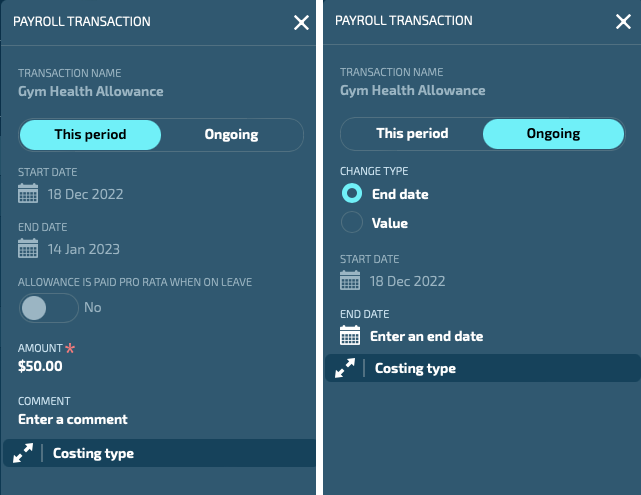
Enter a new amount or end date ongoing transactions:
Available on all ongoing transactions that are added by a user.
Select This period to override the amount for the current pay cycle.
Select Ongoing to change the End date. You may also have the option to change the Value of the ongoing transaction. When you select Value, you can set a new amount that will be applied from a date you choose.
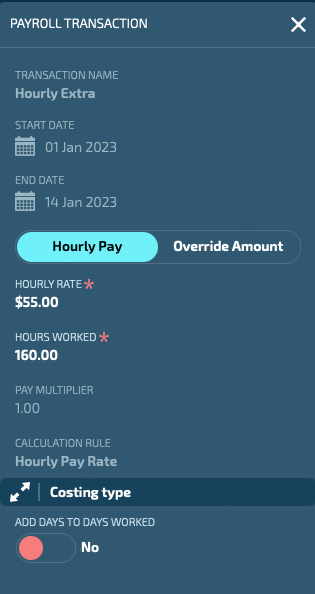
Edit an hourly pay rate transaction.
Select Hourly Pay to change the hourly rate and hours worked.
Select Override Amount to enter a new amount and a comment explaining the change.
When you’ve finished editing the transaction, select the Green Tick Button to save and close the panel.
How to delete a transaction
You can delete a transaction if the Delete icon on the transaction line is red.
Open the employee's Pay Mode:
Go to People > Employees.
Select the employee you need to edit.
Go to Action > Pay Mode.
Under Controls, select the PAY PERIOD and PAY CYCLE you want to edit.
The current pay period and pay cycle are the default selection.
Find the transaction you want to delete, then select the Delete icon in that row.
Read the confirmation message, then select Go ahead.
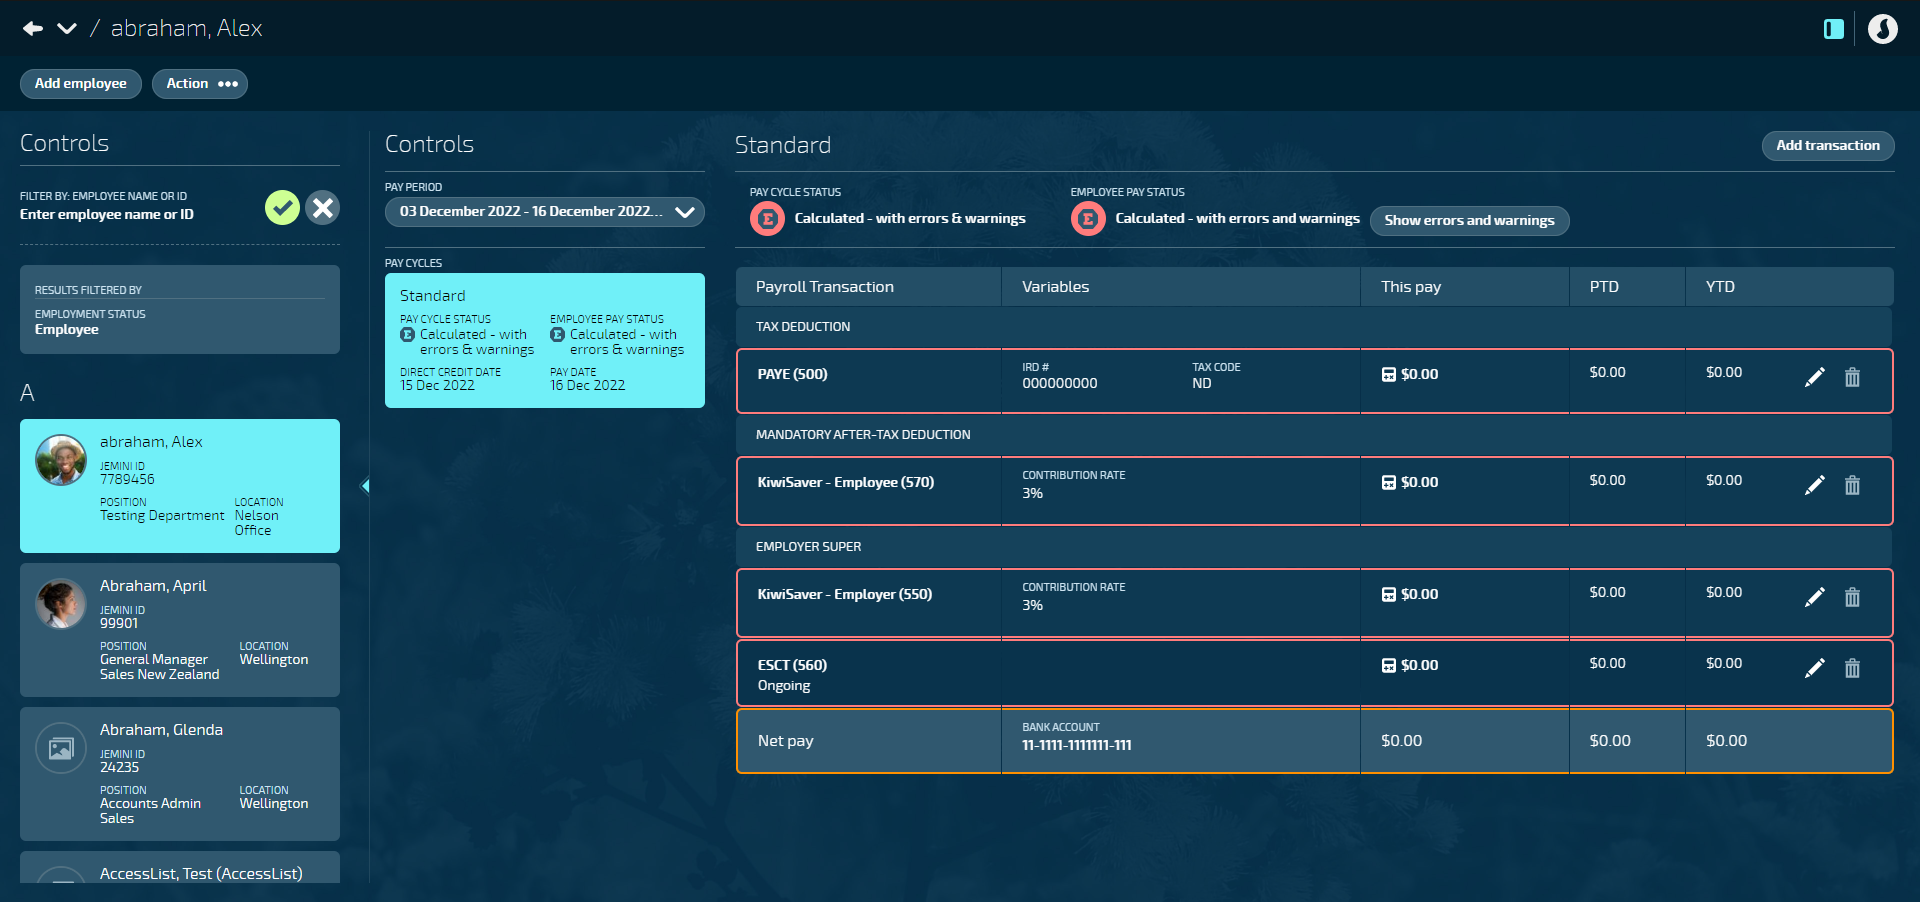
Fixing errors and warnings found when running a pay cycle
When you run a pay cycle (Pay > Pay cycles), you may need to manage individual pays that have been processed with errors or warnings.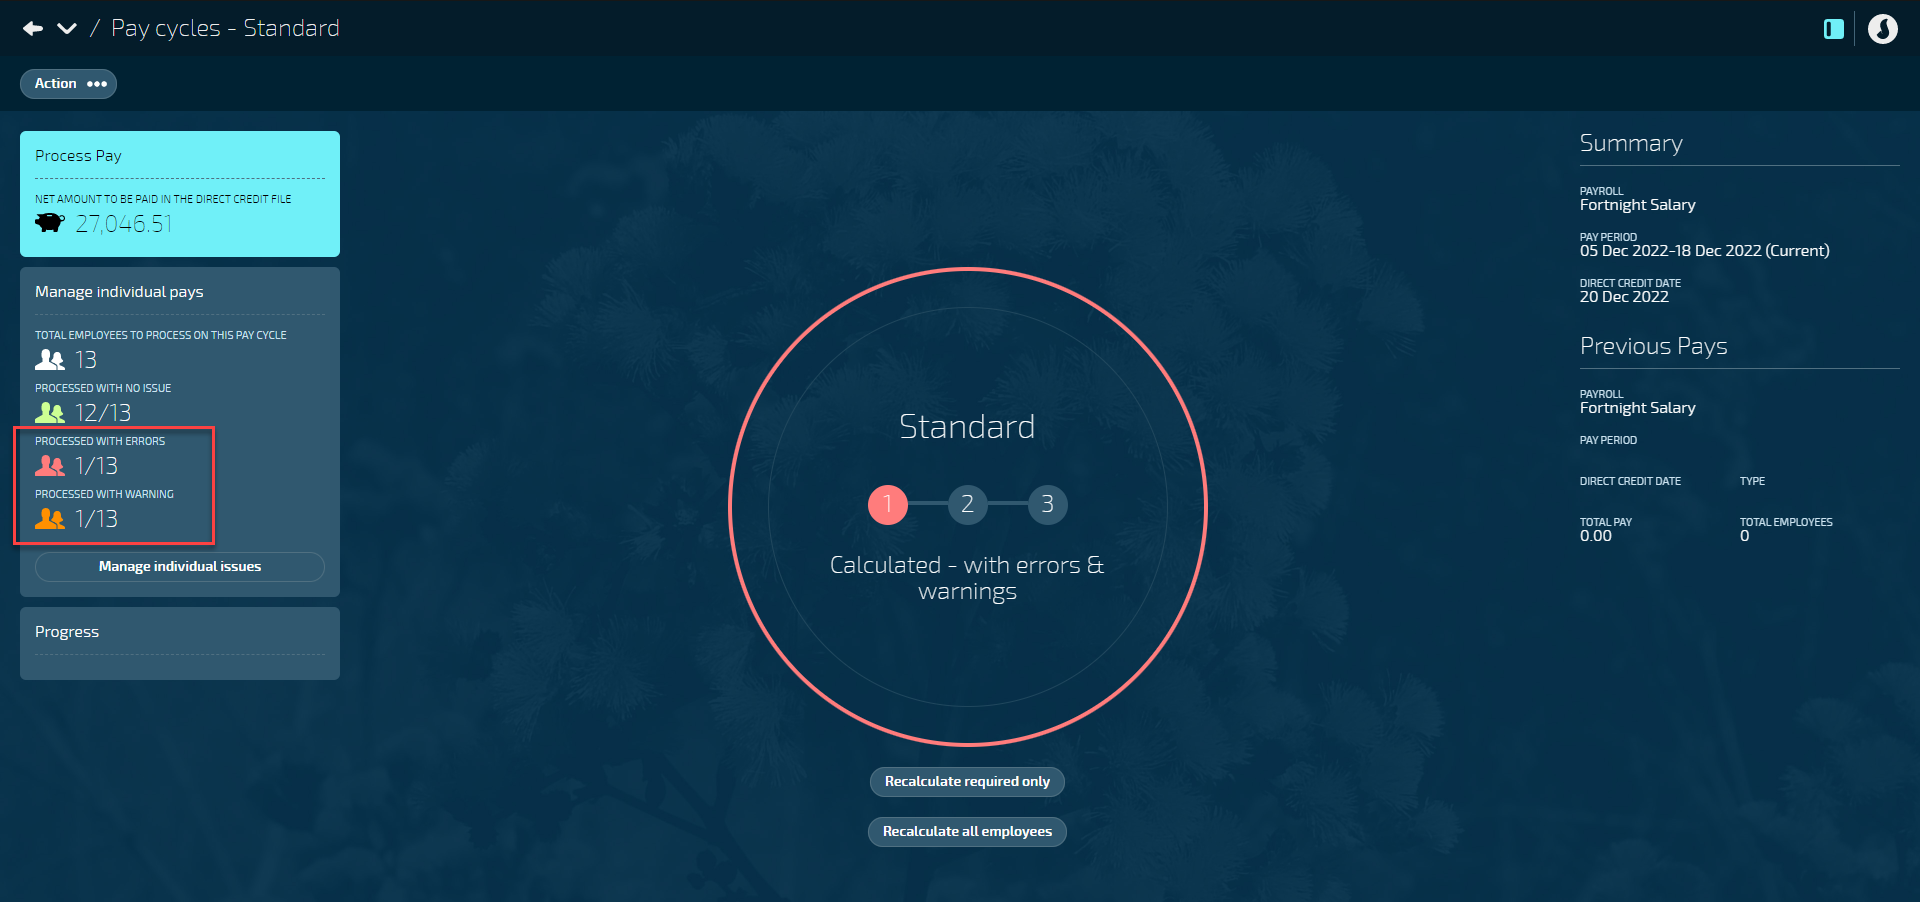
Select Manage individual issues to see which employees were affected. You can then navigate to that employee's Pay Mode (People > Employees > Employee > Action).
Errors in an employee's pay status will be outlined in red.
Warnings in an employee's pay status will be outlined in orange.
Terminating an employee
When an employee is terminated in the Termination bubble, Jemini will automatically generate a termination pay cycle for the employee. You can go to their Pay Mode to check that the automatically applied transactions are correct, and edit any that aren’t. The pay date will be automatically set based on the ‘date to pay termination’ entered when the termination was submitted.
All leave payments that are legislatively required to be paid on termination will automatically be generated. For New Zealand, this is annual leave and alternative holiday.
Other leave plans can have ‘Pay out leave on termination’ set to ‘Yes’. This means that if the employee has a balance greater than 0 for this leave plan, the balance will also be paid out.
You can add any further termination payments by adding transactions to the termination pay cycle.
If the termination pay cycle has been paid to the employee, you can’t add more payments to the termination pay cycle. Instead, the ‘Add a transaction after termination’ button will appear on Pay Mode. Use this button to add any payments that need to be made to the employee after the termination pay cycle has been paid.
 Select this icon when you're done making changes in the panel. Your changes will be saved, and the panel will close.