Who can benefit from this guide?
Payroll staff who are responsible for managing Australian payroll information.
ATO Update Files in Jemini let you send corrections to the ATO outside of your regular payroll runs. Whether you need to fix current year amounts, adjust historical data, update system identifiers, or reset employee records, you can generate the appropriate ATO Update File type directly from Payroll Management. Jemini tracks each update's status from generation through to ATO processing, so you can monitor corrections and handle any validation messages that come back.
You typically use ATO Update Files when employees aren't being paid in that cycle, or when you can't include corrections in the regular payroll submission.
Types of ATO Update Files
There are four different types of ATO Update Files you can generate:
1. Amend YTD/Errors Correction (Most common)
Corrects year-to-date totals and errors in previously submitted data
Uses current "As at" date for generation
Can include YTD Finalisation flag for end-of-financial-year processing
2. Adjust Previous YTD
Updates previous years' YTD totals (up to 5 years back)
Use this to fix errors in previous YTD data
Targets specific financial year ending dates (30 June)
3. Replace Key Identifiers
Updates Payroll ID (Employee ID) or Previous BMS ID when you have existing YTD data
Used for employee ID changes or system migrations
Typically done outside normal payroll processing
4. Zero Out YTD
Resets YTD totals to zero
Used when migrating to new payroll systems or after data corruption
Essentially "clears the slate" for affected employees
How to update an ATO payroll file
How to Amend YTD/Errors Correction
Use this option if there were errors in the ATO Submit file and they need fixing. This could be a changed number or some other amendment. You can also use this option to submit a YTD finalisation file.
Go to PAY > PAYROLL MANAGEMENT.
Choose the relevant payroll from the list under Controls.
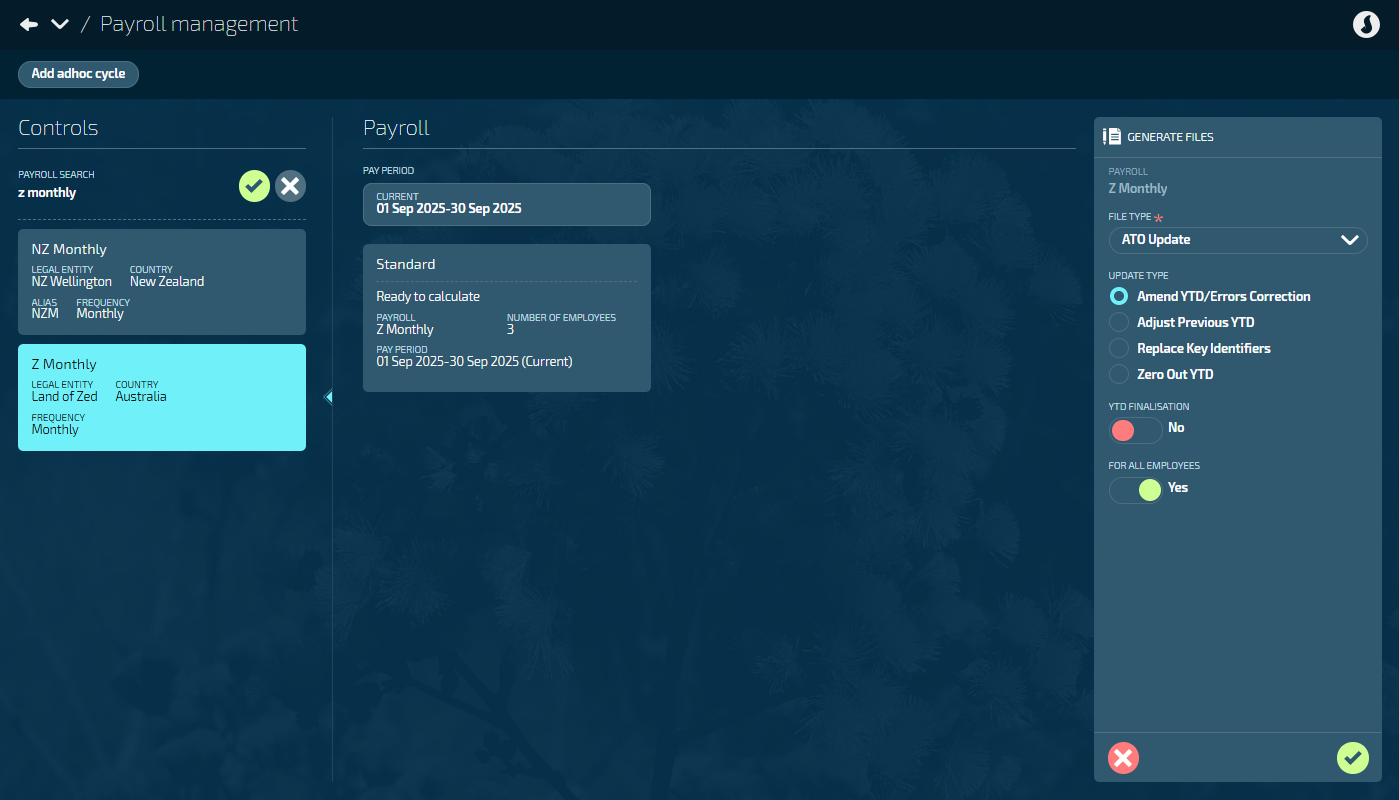
In the Payroll files section, select Generate files to open the GENERATE FILES panel.
Select ATO Update from the FILE TYPE options.
Select Amend YTD/Errors Correction from the UPDATE TYPE options.
Set YTD FINALISATION? to Yes or No.
Default is No.
Set to Yes if you want to submit a YTD finalisation file.
Set FOR ALL EMPLOYEES to Yes or No.
Default is Yes. This will generate a file that includes all employees in the payroll.
Set to No to update only specific employees. When you choose this option, you’ll need to pick employees from the SELECT EMPLOYEES backpack.
Select the Green Tick Button to generate the files.
Review the Files generated display message.
TIP
If there are issues that need fixing, you may need to regenerate the file:
1. Fix the underlying issues in the payroll data
2. Generate a new ATO Update file using the Generate files button again
Choose to Submit now or Submit later (or Fix issues):
If you’re ready to proceed, select Submit now and move on to the next step.
If you’re not ready to proceed, select Submit later. When the panel closes, a Submit file button becomes available in the Pay period files section for you to submit the generated file.
If there are issues, Jemini will show an error or warning icon and create a downloadable CSV file with specific details. Download the CSV file to see what needs to be fixed, address the underlying data issues, then generate a new ATO Update file.
Read and accept the Acknowledge & Submit message,
Select Go back if you’ve changed your mind.
When you submit the file, Jemini will send it to the ATO and you’ll be taken back to the Payroll Management view. Follow the file’s progress in the Payroll files section.
How to Adjust Previous YTD

Use this option to fix errors in previous year YTD data or make other adjustments, such as payments or deductions, for employees on the selected payroll which affect the year-to-date (YTD) totals.
Go to PAY > PAYROLL MANAGEMENT.
Choose the relevant payroll from the list under Controls.
In the Payroll files section, select Generate files to open the GENERATE FILES panel.
Select ATO Update from the FILE TYPE options.
Select Adjust Previous YTD from the UPDATE TYPE options.
Select YTD TO ADJUST from the dropdown list.
Set YTD FINALISATION? to Yes or No.
Default is No.
Set to Yes if you want to submit a YTD finalisation file.
Set FOR ALL EMPLOYEES to Yes or No.
Default is Yes. This will generate a file that includes all employees in the payroll.
Set to No to update only specific employees. When you choose this option, you’ll need to pick employees from the SELECT EMPLOYEES backpack.
Select the Green Tick Button to generate the files.
Review the Files generated display message.
TIP
If there are issues that need fixing, you may need to regenerate the file:
1. Fix the underlying issues in the payroll data
2. Generate a new ATO Update file using the Generate files button again
Choose to Submit Now or Submit later (or Fix issues):
If you’re ready to proceed, select Submit Now and move on to the next step.
If you’re not ready to proceed, select Submit later. You’ll be taken back to the payroll processing screen where the pay period files will be updated. A Submit File button will be available in the Pay period files section for you to submit the generated file.
If there are issues, Jemini will show an error or warning icon and create a downloadable CSV file with specific details. Download the CSV file to see what needs to be fixed, address the underlying data issues, then generate a new ATO Update file.
Read and accept the Acknowledge & Submit message,
Select Go back if you’ve changed your mind.
When you submit the file, Jemini will send it to the ATO and you’ll be taken back to the Payroll Management view. Follow the file’s progress in the payroll files section.
How to Replace Key Identifiers

Use this option to send a correction or change to an employee’s Payroll ID (Employee ID) or Previous BMS ID – normally done outside of the normal payroll process.
Payroll ID identifies the System employee code to the ATO.
Previous BMS ID identifies the system the submit or update files come from.
Examples of use:
Changing an employee’s Payroll ID to another in the same system.
Adding new employees to the system and adding their Previous BMS ID and/or Payroll ID (Employee ID).
Go to PAY > PAYROLL MANAGEMENT.
Choose the relevant payroll from the list under Controls.
In the Payroll files section, select Generate files to open the GENERATE FILES panel.
Select ATO Update from the FILE TYPE options.
Select Replace Key Identifiers from the UPDATE TYPE options.
Set FOR ALL EMPLOYEES to Yes or No.
Default is Yes. This will generate a file that includes all employees in the payroll.
Set to No to update only specific employees. When you choose this option, you’ll need to pick employees from the SELECT EMPLOYEES backpack.
Select the Green Tick Button to generate the files.
Review the Files generated display message.
TIP
If there are issues that need fixing, you may need to regenerate the file:
1. Fix the underlying issues in the payroll data
2. Generate a new ATO Update file using the Generate files button again
Choose to Submit Now or Submit later (or Fix issues):
If you’re ready to proceed, select Submit Now and move on to the next step.
If you’re not ready to proceed, select Submit later. You’ll be taken back to the payroll processing screen where the pay period files will be updated. A Submit File button will be available in the Pay period files section for you to submit the generated file.
If there are issues, Jemini will show an error or warning icon and create a downloadable CSV file with specific details. Download the CSV file to see what needs to be fixed, address the underlying data issues, then generate a new ATO Update file.
Read and accept the Acknowledge & Submit message,
Select Go back if you’ve changed your mind.
When you submit the file, Jemini will send it to the ATO and you’ll be taken back to the Payroll Management view. Follow the file’s progress in the payroll files section.
How to Zero Out YTD
Use this option when loading someone into a new payroll system, or if something goes wrong with the payroll system like a data corruption or needs to be reformatted.
Go to PAY > PAYROLL MANAGEMENT.
Choose the relevant payroll from the list under Controls.
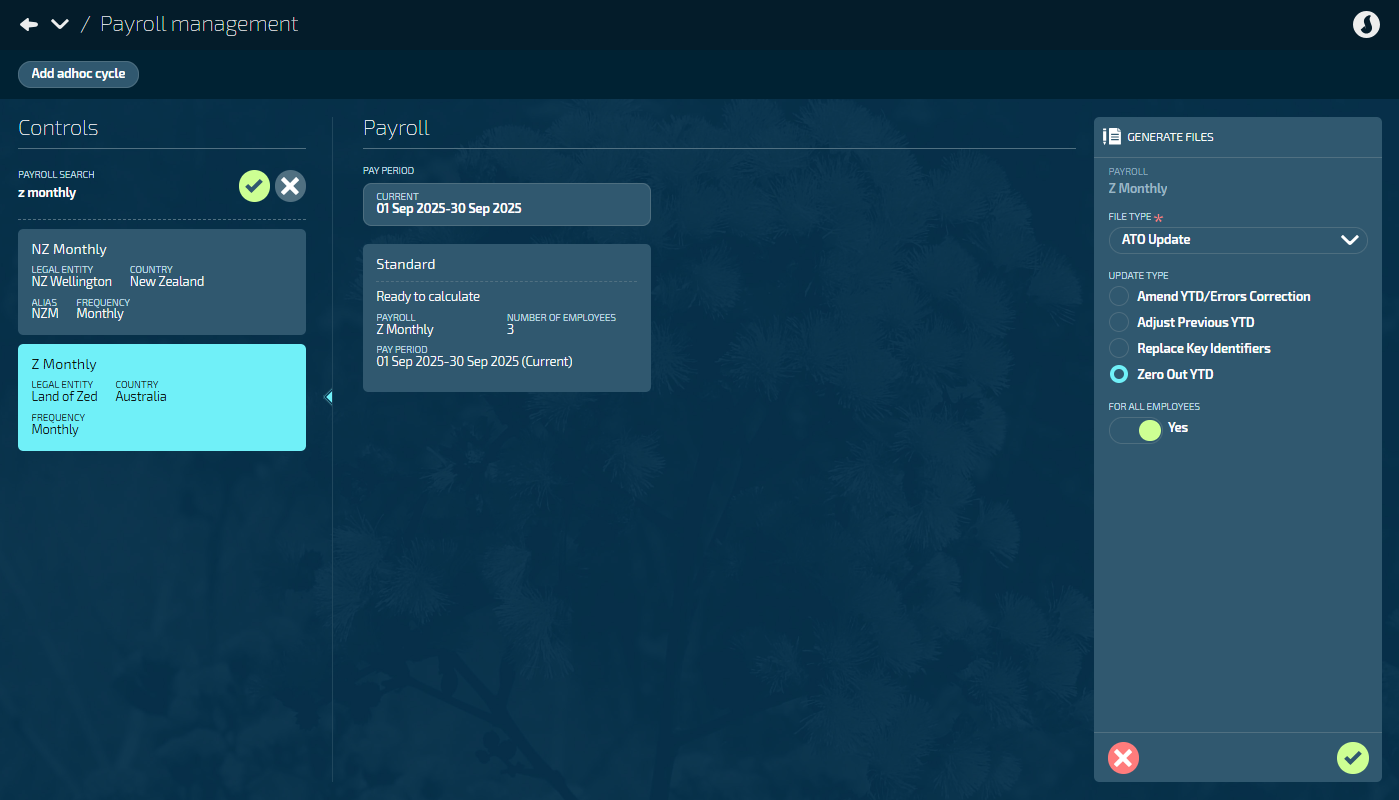
In the Payroll files section, select Generate files to open the GENERATE FILES panel.
Select ATO Update from the FILE TYPE options.
Select Zero Out YTD from the UPDATE TYPE options.
Set FOR ALL EMPLOYEES to Yes or No.
Default is Yes. This will generate a file that includes all employees in the payroll.
Set to No to update only specific employees. When you choose this option, you’ll need to pick employees from the SELECT EMPLOYEES backpack.
Select the Green Tick Button to generate the files.
Review the Files generated display message.
TIP
If there are issues that need fixing, you may need to regenerate the file:
1. Fix the underlying issues in the payroll data
2. Generate a new ATO Update file using the Generate files button again
Choose to Submit Now or Submit later (or Fix issues):
If you’re ready to proceed, select Submit Now and move on to the next step.
If you’re not ready to proceed, select Submit later. You’ll be taken back to the payroll processing screen where the pay period files will be updated. A Submit File button will be available in the Pay period files section for you to submit the generated file.
If there are issues, Jemini will show an error or warning icon and create a downloadable CSV file with specific details. Download the CSV file to see what needs to be fixed, address the underlying data issues, then generate a new ATO Update file.
Read and accept the Acknowledge & Submit message,
Select Go back if you’ve changed your mind.
When you submit the file, Jemini will send it to the ATO and you’ll be taken back to the Payroll Management view. Follow the file’s progress in the payroll files section.
Files generated display message
When you generate an ATO Update File, a confirmation message will display key information.
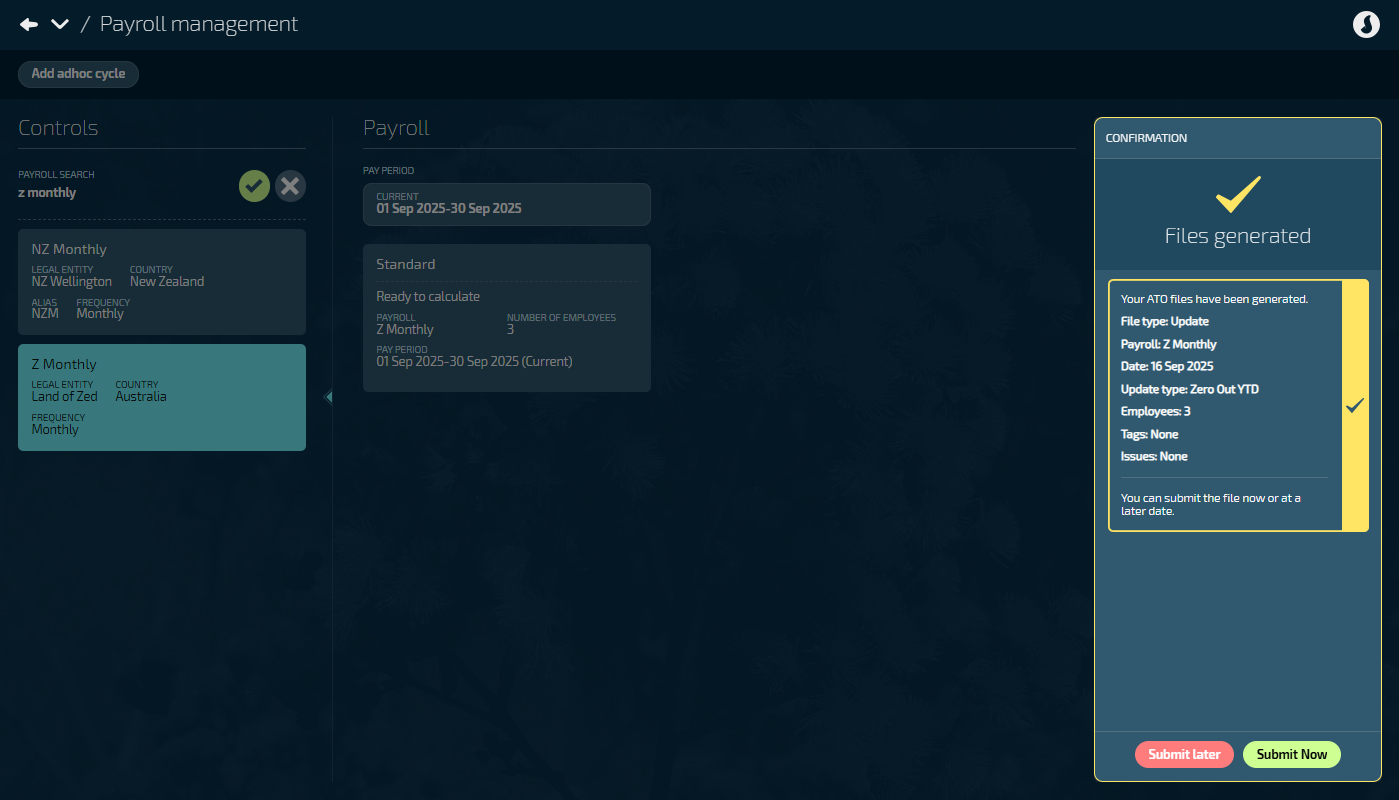
The message contains:
File type (Update)
Payroll (the payroll it was generated for)
Date (the date it was generated on)
Update type: (Amend YTD/Errors Correction, Adjust previous YTD, Replace Key Identifiers, or Zero Out YTD)
Employees (the number of employees included in the file)
Tags - These identify what actions you’ve taken:
None (Regular submission)
YTD Finalisation
Issues (Any issues that occurred during file generation will be displayed here).
