Navigation: People | Lifecycle | Onboarding
What's an Onboarding Task?
Onboarding tasks are assigned to the new starter (employee), their manager, or a specific position establishment to complete as the onboarding workflow progresses.
Tasks setup is probably the biggest part of the workflow setup process. Before you begin, ask yourself, “What tasks do I need to create?” By jotting down the necessary tasks and mapping them out beforehand, you can create a clear plan and better understand your organisation's onboarding goals and the path to achieving them.
Tasks can be found in the Tasks view, which is in the Catalogue view.
Onboarding tasks are sorted into various types
When you create a task, you'll need to select a task type. The task types are connected to the relevant areas in Jemini. Currently, three task types are available:
- Action
If you select the Action task type, you'll need to choose which Action bubble to connect the task to. Action bubbles that can be connected are Bank accounts, KiwiSaver, Occupancy, Pay Rate, Super Fund, Tax Details, Termination, TFN, User Profile, and Work Pattern. When an assignee completes an action task, the connected action bubble will also be completed.TIPBank Accounts, KiwiSaver (NZ only), and Super Funds are the only action options available for employees.
- Profile
If you select the Profile task type, you'll need to choose which Profile bubble to connect the task to. Profile bubbles that can be connected are Contact Details, Demographic, Emergency Contacts, Entitlement to Work, Health, Profile, and Style & Strength. When an assignee completes a profile task, the connected profile bubble will also be completed. - Onboarding
The Onboarding task type option is for onboarding tasks that aren't related to either Action or Profile bubbles (for example, a task may need to be created for the new starter to read and sign their employment contract).
Aspirations, Performance and Upskilling task types will be available in a later release.
Task access permissions to consider
The task assignee may have limited access to some tasks. For example, the only action tasks available to an employee are Bank Accounts, KiwiSaver (NZ only), and Super Funds, while a manager can access the full list if the required permissions are set in their security profile. Please consider what permissions are set in the user's security profile when assigning a task to them.
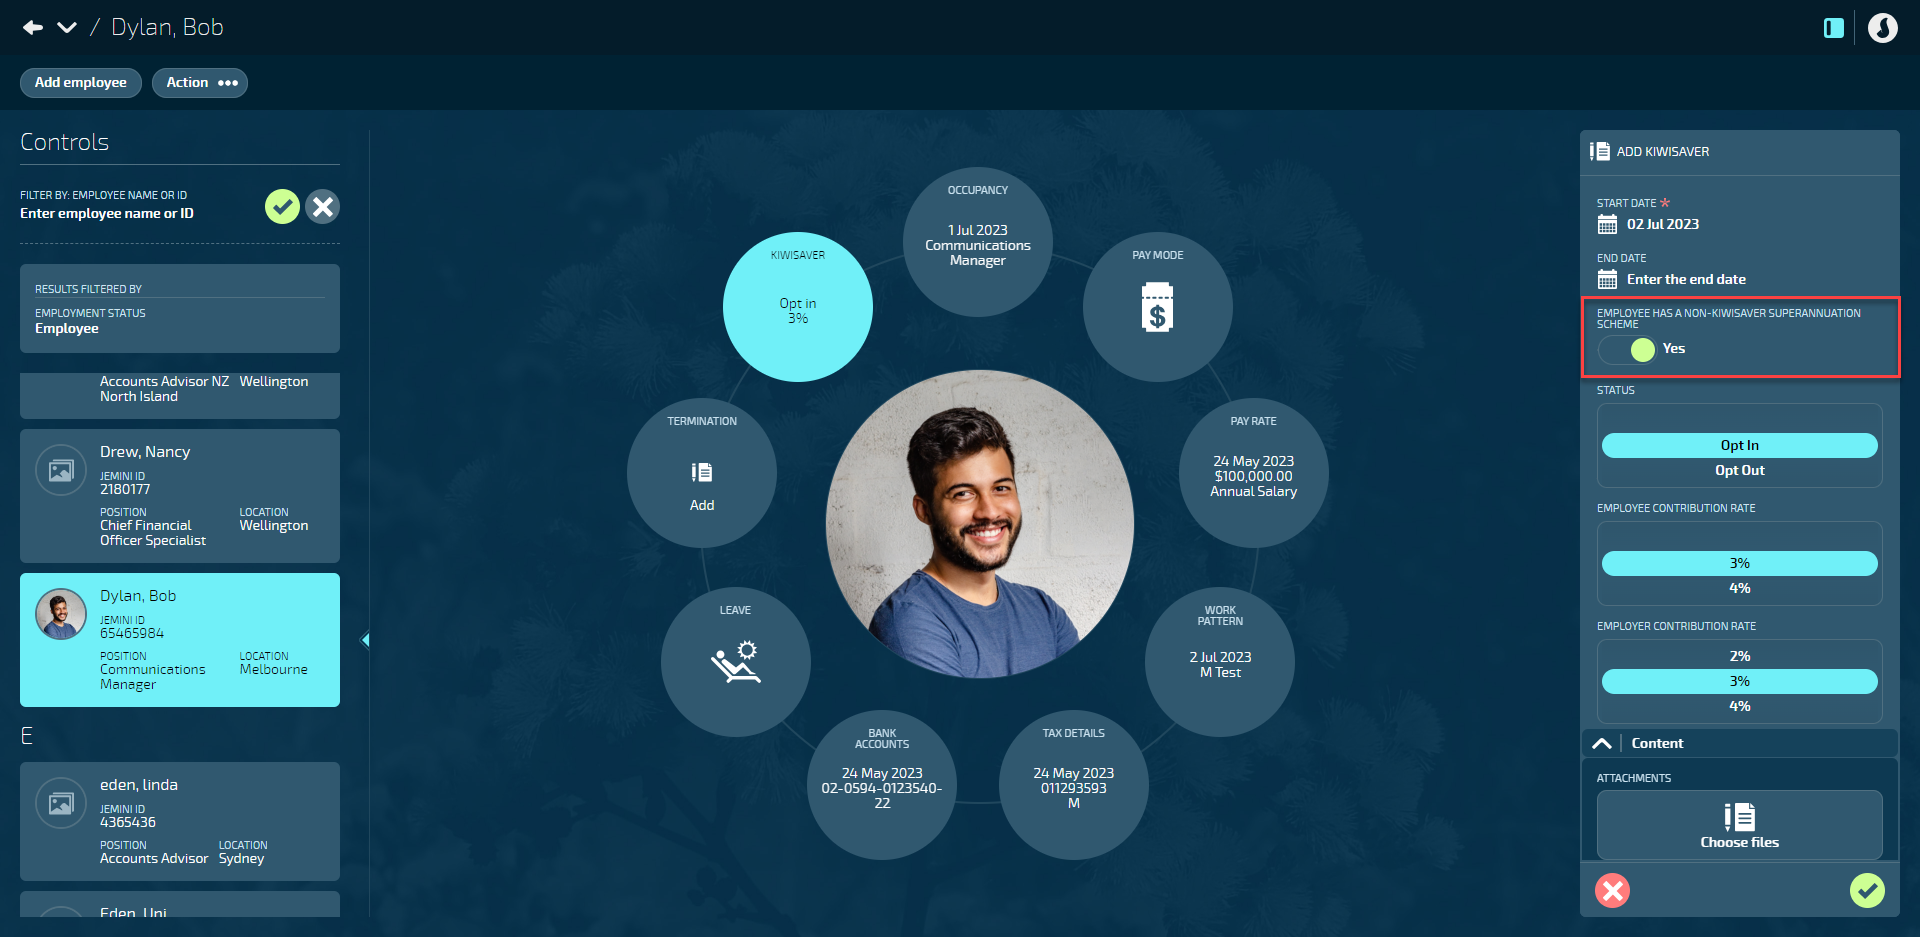
A New Zealand employee's Super Fund task can only be accessed if their KiwiSaver record has the "EMPLOYEE HAS A NON-KIWISAVER SUPERANNUATION SCHEME" setting set to Yes. However, employees currently can't change this setting themselves. A manager must set it to Yes for the employee to access their Super Fund task.
How to set up an Onboarding Task
The below instructions show how to set up onboarding tasks with the three different task types: Action, Profile, and Onboarding.
How to set up an Onboarding Task with an Action task type
- Go to People | Lifecycle | Onboarding.
- Select Catalogue in the Controls.
- Select Tasks in the Controls.
- Select Add onboarding task. This will open the ADD ONBOARDING TASK panel.
- Enter the NAME of the task. The name indicates what the task is and helps you organise the different tasks as more are created.
- (Optional): Enter the DESCRIPTION. The description can include information about the task or provide clear instructions to the task owner, outlining what needs to be done and any relevant details.
- Select WHO MUST COMPLETE THIS TASK from the user types or position establishments backpacks. This is who the task will be assigned to. For example, if a computer needs setting up before the new starter's employment starts, you could assign a task to an IT Support position establishment, or nearest equivalent.
- To select the TASK TYPE, open the ONBOARDING TASK TYPE backpack and choose Action. This will activate the ACTION BUBBLE step.
- To select the ACTION BUBBLE, open the ACTION BUBBLE backpack and choose on of the options (Bank accounts, KiwiSaver, Occupancy, Pay Rate, Super Fund, Tax Details, Termination, TFN, User Profile, and Work Pattern).
Bank Accounts, KiwiSaver (NZ only), and Super Funds are the only action options available when the employee user type has been selected.
- Settings section: Enter the email or select the user type or position establishment to establish WHO RECEIVES A COPY OF NOTIFICATION WHEN THE TASK IS COMPLETE. More than one person can receive the notification.
- Set ACTIVE to Yes or No depending on whether you want to make the task visible yet. If you're still setting up tasks, you may want to keep them deactivated until you're ready to start adding them to workflows and assigning them to new starters.
- Select the Submit icon to save and close.
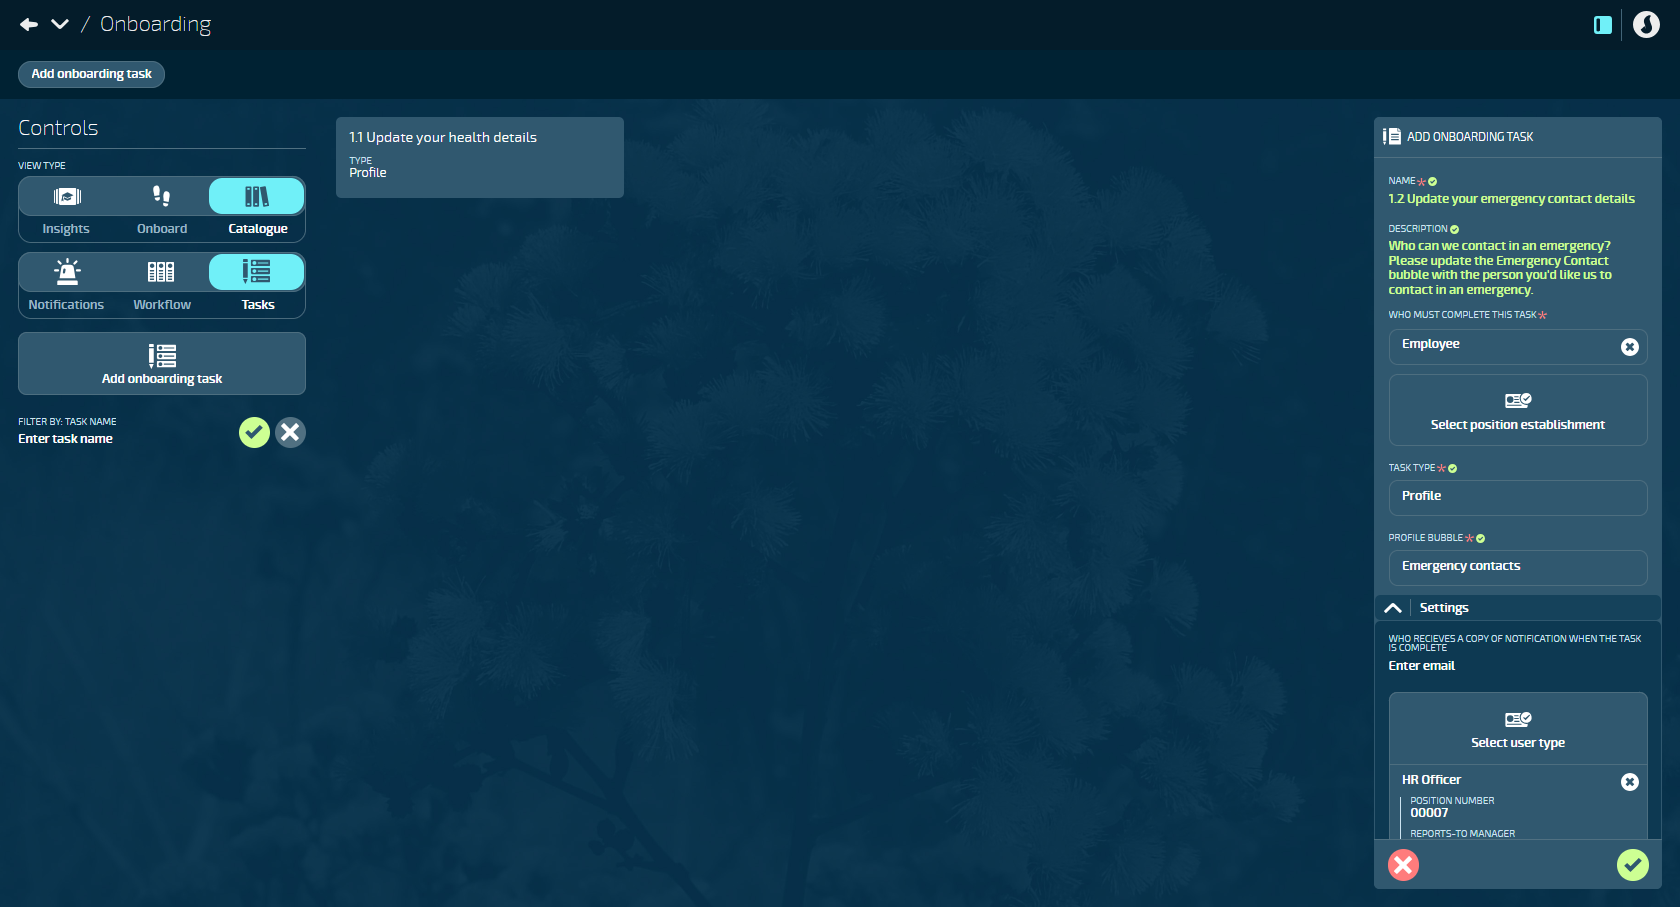
How to set up an Onboarding Task with a Profile task type
- Go to People | Lifecycle | Onboarding.
- Select Catalogue in the Controls.
- Select Tasks in the Controls.
- Select Add onboarding task. This will open the ADD ONBOARDING TASK panel.
- Enter the NAME of the task. The name indicates what the task is and helps you organise the different tasks as more are created.
- (Optional): Enter the DESCRIPTION. The description can include information about the task or provide clear instructions to the task owner, outlining what needs to be done and any relevant details.
- Select WHO MUST COMPLETE THIS TASK from the user types or position establishments backpacks. This is who the task will be assigned to. For example, if a computer needs setting up before the new starter's employment starts, you could assign a task to an IT Support position establishment, or nearest equivalent.
- To select the TASK TYPE, open the ONBOARDING TASK TYPE backpack and choose Profile. This will activate the PROFILE BUBBLE step.
- To select the PROFILE BUBBLE, open the PROFILE BUBBLE backpack and choose on of the options (Contact Details, Demographic, Emergency Contacts, Entitlement to Work, Health, Profile, and Style & Strength).
- Settings section: Enter the email or select the user type or position establishment to establish WHO RECEIVES A COPY OF NOTIFICATION WHEN THE TASK IS COMPLETE. More than one user can receive the notification.
- Set ACTIVE to Yes or No depending on whether you want to make the task visible yet. If you're still setting up tasks, you may want to keep them deactivated until you're ready to start adding them to workflows and assigning them to new starters.
- Select the Submit icon to save and close.
How to set up an Onboarding Task with an Onboarding task type
- Go to People | Lifecycle | Onboarding.
- Select Catalogue in the Controls.
- Select Tasks in the Controls.
- Select Add onboarding task. This will open the ADD ONBOARDING TASK panel.
- Enter the NAME of the task. The name indicates what the task is and helps you organise the different tasks as more are created.
- (Optional): Enter the DESCRIPTION. The description can include information about the task or provide clear instructions to the task owner, outlining what needs to be done and any relevant details.
- Select WHO MUST COMPLETE THIS TASK from the user types or position establishments backpacks. This is who the task will be assigned to. For example, if a computer needs setting up before the new starter's employment starts, you could assign a task to an IT Support position establishment, or nearest equivalent.
- To select the TASK TYPE, open the ONBOARDING TASK TYPE backpack and choose Onboarding. This will activate the next Onboarding sections (Content and Employee specific content).
- Content: Add ATTACHMENTS or LINKS for the assignee complete the task, if required. For example, an attachment could be a contract that the new starter needs to read, and a link could take them to a training website.
- Employee specific content: Select who can add attachments, links, notes, a signature, and who can view the task, if required. For example, you may need the assignee to attach a completed form, add a link to a portfolio, answer questions in the notes section, or provide a signature for a contract.
- Settings section: Enter the email or select the user type or position establishment to establish WHO RECEIVES A COPY OF NOTIFICATION WHEN THE TASK IS COMPLETE. More than one user can receive the notification.
- Set ACTIVE to Yes or No depending on whether you want to make the task visible yet. If you're still setting up tasks, you may want to keep them deactivated until you're ready to start adding them to workflows and assigning them to new starters.
- Select the Submit icon to save and close.
What to do after setting up tasks
Once you have a collection of Onboarding Tasks set up, you can create an Onboarding Workflow, then Onboarding Steps. The Tasks can be added to Steps.
If you'd prefer to set up Notifications next, go to Onboarding Notifications setup.
