Navigation: People | Lifecycle | Onboarding
We want you to get the best out of the Onboarding experience, so please reach out to your consultant first for guidance and training.
To book a consultation, raise an iHelp through Infusion.
Click or tap here to view permission settings
To give a user access to the Onboarding bubble:
- Go to System | Security profiles.
- Select the Security Profile that requires access to the Onboarding bubble.
- In Permissions, scroll down and expand Onboarding to find the Onboarding application permissions.
- Tick relevant Enable, View, Add, Change and Delete boxes for each Onboarding feature.
To protect an onboarding workflow from being accidentally switched back to the system workflow by various users, make sure only specific security profiles (like HR managers) have the 'Add' permission ticked for:
- Employee records (Employees | Employee application)
- Onboarding employees (Onboarding | Onboarding application)
- Onboarding employee workflows (Onboarding | Onboarding application)
Please reach out to our support team for assistance: Book a consultation.
What's Onboarding?
Onboarding is the very beginning of an employee's journey through their employment lifecycle. It's the process of introducing new starters to a company’s expectations, skills, knowledge, and culture. The process typically starts when a successful candidate accepts the job offer.
Jemini has a new feature called Onboarding that helps recruiters with this process by allowing them to set up onboarding workflows and steps to manage and assign the tasks involved in onboarding new starters.
Onboarding views
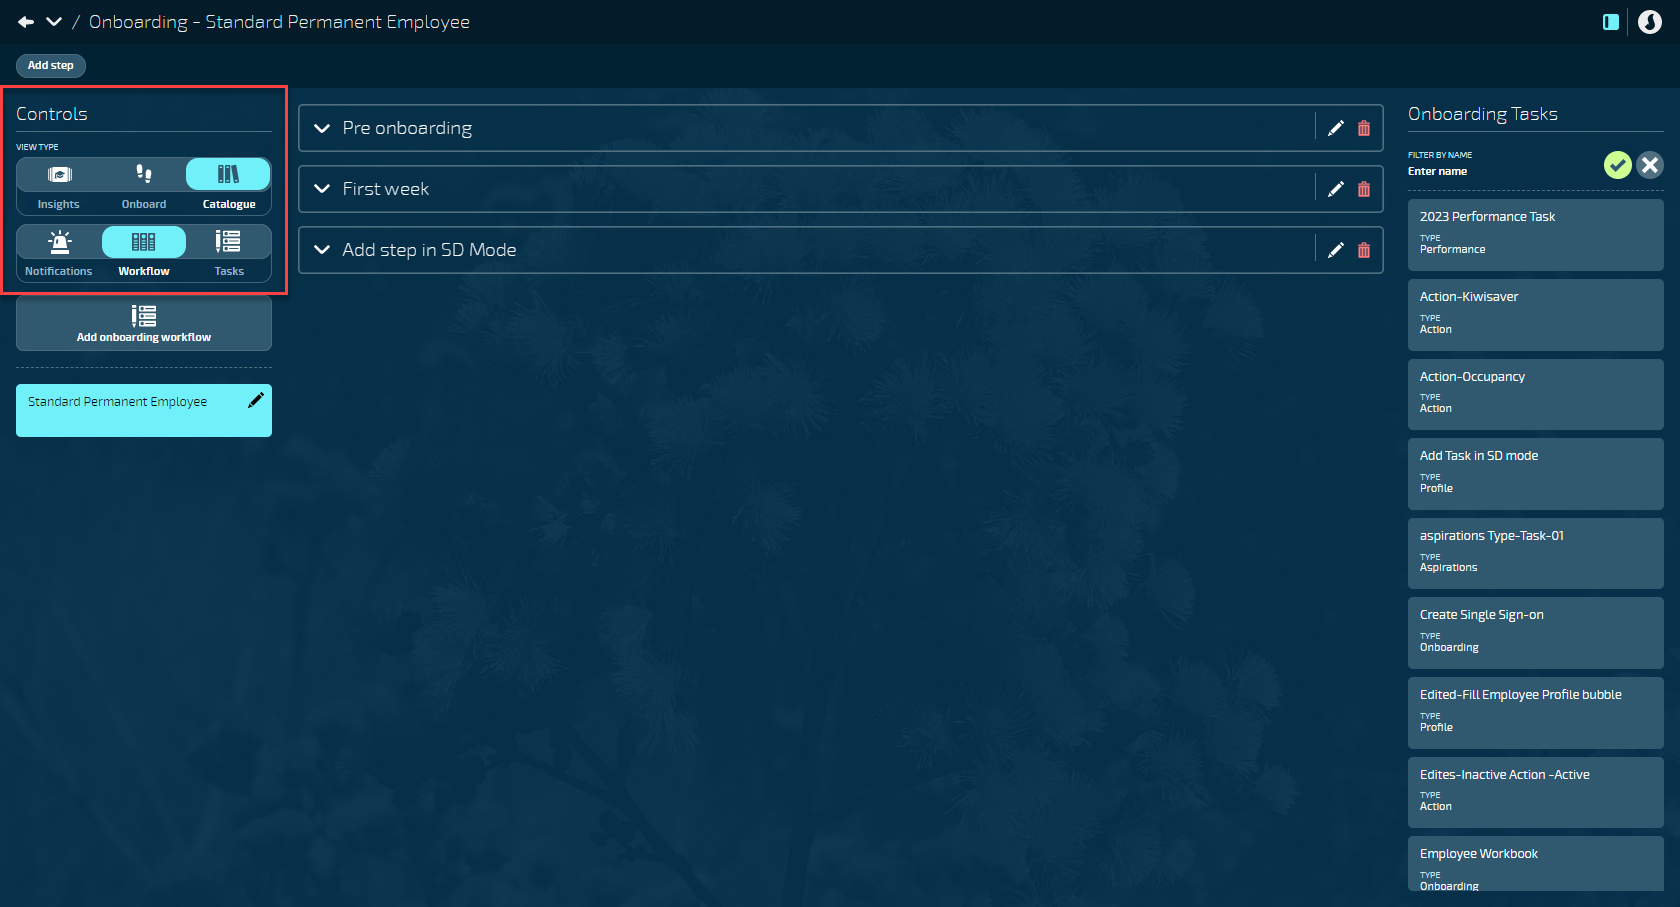
There are three main views in Onboarding. You can change these views in Controls.
- Catalogue view — Use the catalogue view to create onboarding workflows.
- Onboard view — Use the onboard view to attach workflows to new starters and manage their progress. Tasks can be completed by managers in this view (employees can complete their tasks in Your Jemini).
- Insights view — Use the insights view to analyse onboarding data in the form of reports.
What's the Catalogue view?
The onboarding catalogue is where you can create and manage multiple onboarding workflows to help onboard new starters.
The Catalogue view is divided into three additional views that can be changed in the Controls:
- Workflow view
- Tasks view
- Notifications view
Workflows are a collection of tasks that you have different employees go through. You may have a workflow for your standard permanent employees. And you may have a workflow for your casual employees. Each type of employee will have a slightly different onboarding process to go through, and so you'll have a different workflow or group of tasks depending on who you are onboarding. You can build up as many of these workflows as you'd like.
Within a Workflow, you can create Steps that are activated at particular dates.
Within the Steps are Tasks. These can be created in the Tasks view and assigned to employees, managers, or other position establishments.
You can also attach Notifications to each Step. These can notify the new starter (employee), their manager, or a specific position establishment about a step status and what they need to do. The Notifications view is a shortcut that takes you to the Notifications Catalogue in the System bubble.
Once an entire Workflow is set up, it can be connected to an employee at the start of their onboarding journey.
Questions to ask yourself when setting up an onboarding workflow
Onboarding is a way of bringing your employees, once you’ve recruited them, into the system and giving them access to Jemini before they start employment (pre-recruitment). Their onboarding process can then continue into the first few months of their employment (or however long you need).
It's important to consider how to make the onboarding process work for you. Ask yourself:
- What are some pre-recruitment tasks that the new starter needs to complete? For example, sign a contract, add bank account details, and add emergency contact details.
- Once their employment has begun, what do we need to do with them for the first week, month, or more? For example, attend training courses or complete a one month review.
- How can we group the various tasks into steps? For example, "Step one: pre-recruitment", "Step two: day one", "Step three: week one".
- How long do we want onboarding to last? For example, one month? Six months? The length of the new starter's probation or training periods?
It's a good idea to take some time to map out how you want your onboarding to look. You may need to create different workflows for different employee types.
Where to begin setting up an onboarding workflow
To begin setting up an onboarding workflow, we recommend you first set up the Tasks. Then create the Workflows, which will contain the collection of tasks. Next, create the Steps, which allow you to group the tasks. Finally, set up the Notifications, which will need to be connected steps (you can set up notifications first if you already have a good idea of the steps and tasks you need to create).
- Learn how to set up Tasks
Tasks are assigned to the new starter (employee), their manager, or a specific position establishment to complete as the onboarding workflow progresses. - Learn how to set up Workflows
Workflows are the structures that hold the tasks and steps together and form the whole onboarding process for each type of employee. - Learn how to set up Steps
Steps sit within a workflow and help you organise each stage of the onboarding process by grouping tasks in the same periods with set start and end dates. - Learn how to set up Notifications
Use notifications to let the new starter (employee), their manager, or a specific position establishment know when a step starts or ends and what they need to do during that period.
What's the Onboard view?
Workflows must be set up in the Catalogue view before you can start to use the Onboard view.
Use the Onboard view to assign workflows to new starters and to manage the already assigned workflows.
In the Onboard view, you can:
- Onboard a new starter by selecting Add employee and assigning a workflow to them.
- Filter the employee list by workflows that are Not started, In progress, Completed, or Withdrawn, or by employees that have No workflow assigned.
- Select an employee from the list under Controls to view their workflow.
- Assign a workflow to an employee if the employee has already been added to Jemini.
- View each employee's workflow status.
- Complete tasks that have been assigned to you.
- View tasks assigned to other users.
To learn more about the Onboard view, go to Intro to the Onboard view.
What's the Insights view?
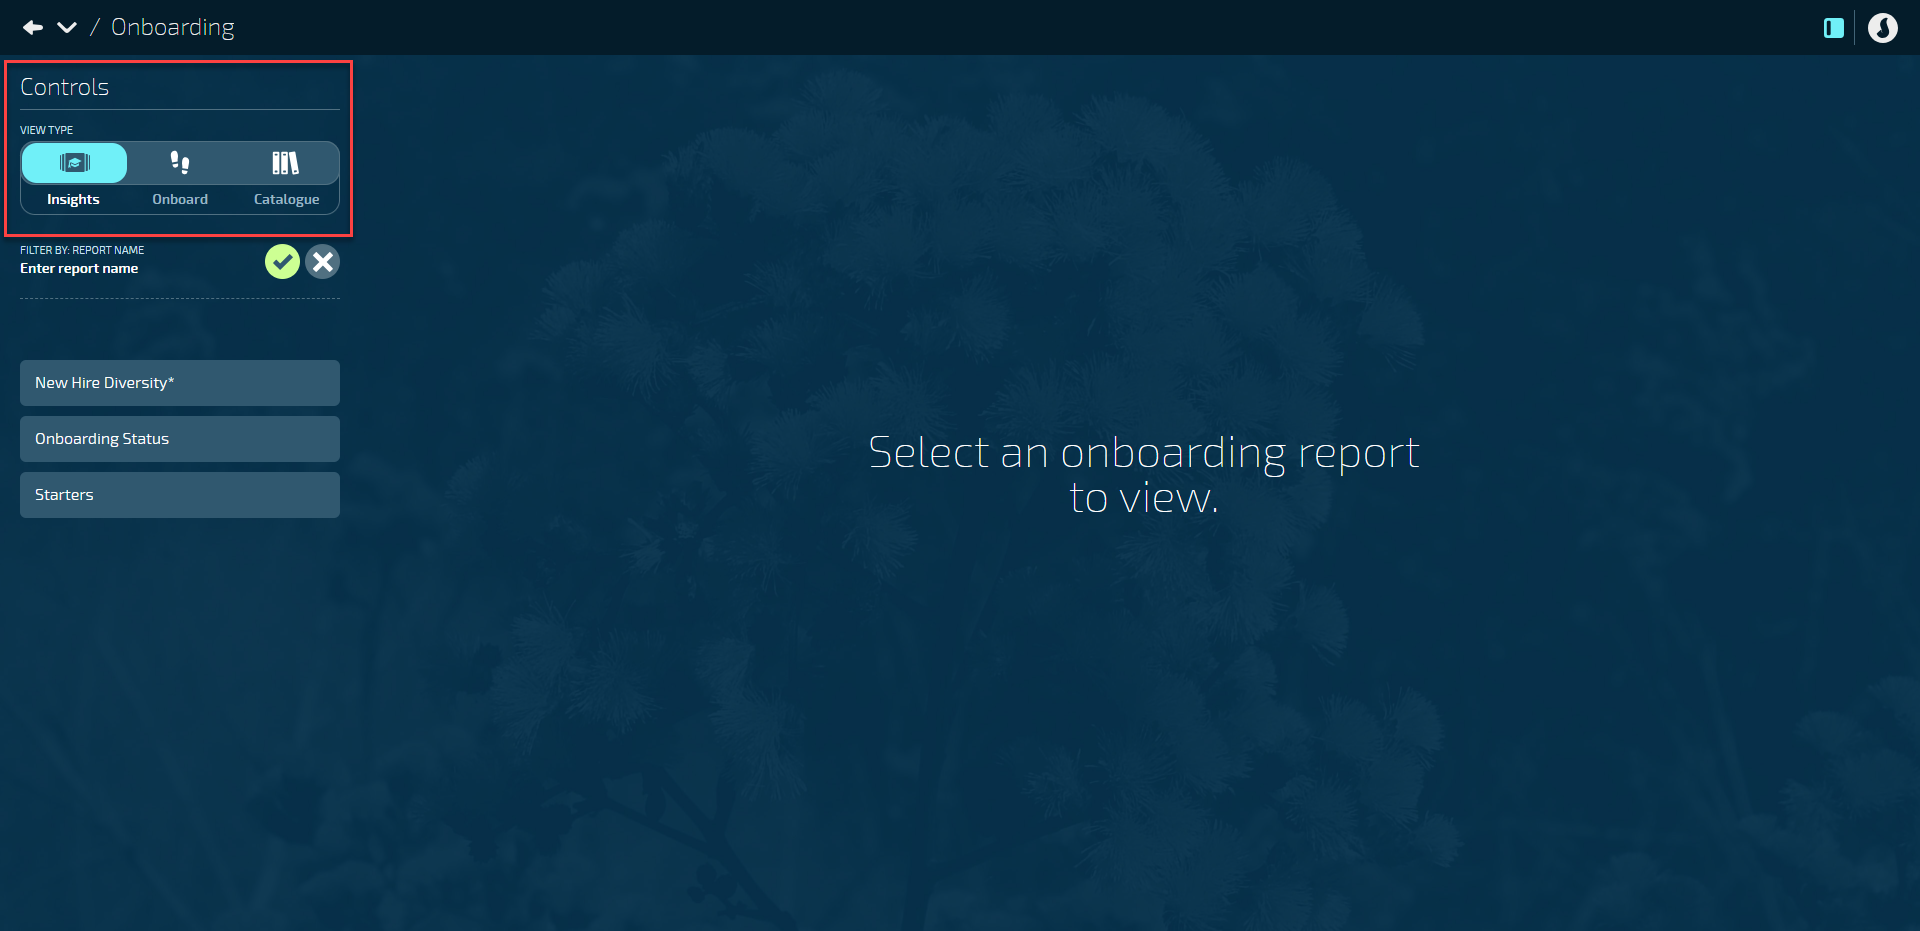
The Insights view allows you to review the reports related to onboarding within the Onboarding bubble instead of having to navigate to the Reporting bubble separately.
The reports in the Insights view will pick up anyone going through the onboarding process. They'll give you an analysis of who you’re bringing on and how they fit into the wider organisation.
You can change the date range to include or exclude employee data, depending on when they were onboarding. A range of filters allows you to adjust which data to display.