Who can benefit from this guide?
Anyone responsible for New Zealand business configuration, such as an HR manager or Jemini consultants. For the Australian guide, refer to How to add Legal Entity Organisation Components (Australia only).
How Legal Entity Organisation Components work
Organisation Components that are set up as Legal Entities are the foundation for your payrolls. Each payroll must have a Legal Entity Organisation Component connected to it.
What you’ll find in this guide
TIP
Before you start setting up a Legal Entity Organisation Component, these need to be created first:
Locations (if you want to connect Organisation Components to locations)
Autonumbers (if the Organisation Component is an Owner too)
How to add a New Zealand Legal Entity Organisation Component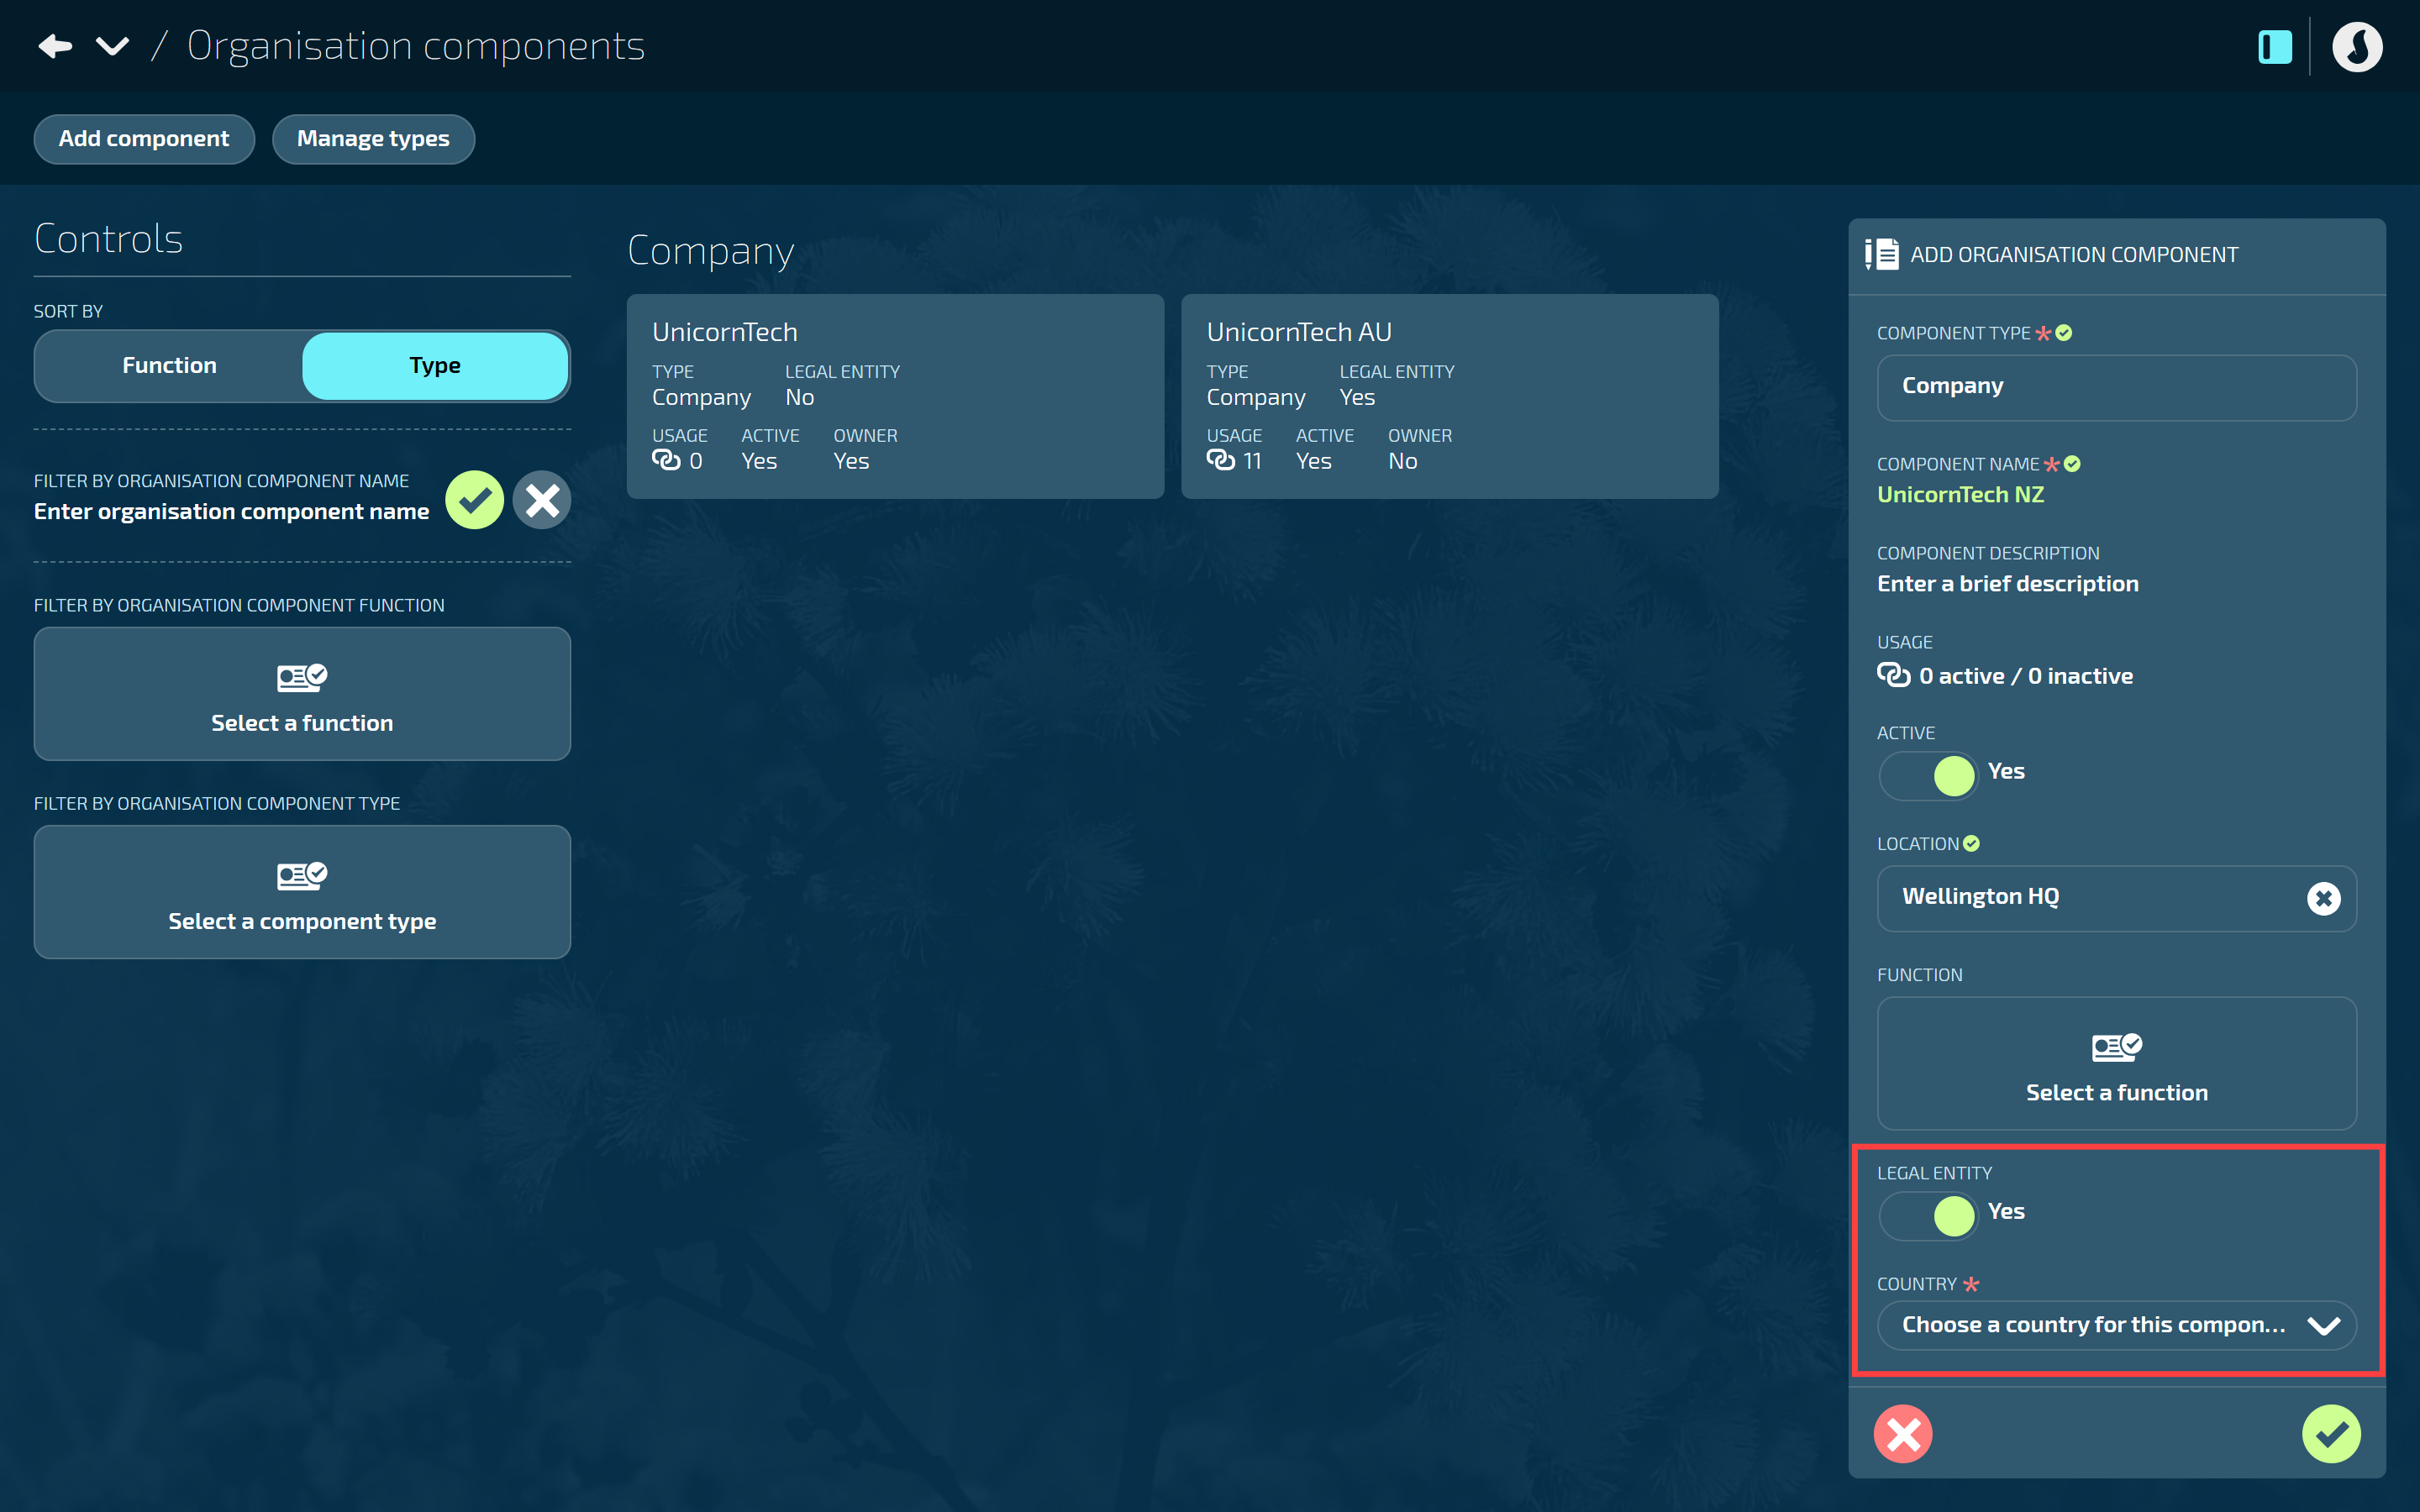
TIP
What you’ll need before you begin:
Payer information:
IRD number
IRD authorising officer
Trading name
Contact name and details
Identification number:
IRD number
Banking details:
Payer name
Financial institution
Account name and number
Transaction Details:
Direct credit file format
Optional:
Contact account number
ACC Levy Rate for BIC code
Go to BUSINESS > ORGANISATION COMPONENTS > ORGANISATION COMPONENTS.
Select Add component to open the ADD ORGANISATION panel.
Select a COMPONENT TYPE to open the COMPONENT TYPES backpack and choose one from the list.
Component types are configured specifically for your organisation. Refer to How to manage Component Types.
Enter the COMPONENT NAME.
We suggest using a name that helps you to quickly and easily identify the component.
The name will appear when connecting the component to a payroll, person, or position.
(Optional) Enter the COMPONENT DESCRIPTION.
The description you use can help you identify the purpose of the component.
The USAGE is an indicator for how many connections the component has.
Set ACTIVE to Yes or No.
Set to Yes to make the component visible and available to use in other areas of Jemini
Set to No to hide the component from other areas in Jemini until you're ready to activate it.
(Optional) Select a LOCATION by opening the LOCATIONS backpack and choosing one from the list.
Locations allow you to categorise your organisation components by area. For example, if your legal entity is based in your Auckland head office, you might want add that location to the component.
Locations are configured specifically for your organisation. Refer to Locations - Getting started.
(Optional) Select a FUNCTION by opening the FUNCTIONS backpack and choosing one from the list.
Functions allow you another way to categorise your organisation components. There’s also a filter option in the Organisation Components Controls, allowing you to sort your organisation components by function.
Functions are configured specifically for your organisation. These are set up in Business Core Tables.
Set LEGAL ENTITY to Yes.
When set to Yes, you’ll need to provide the following information regarding the legal entity:
COUNTRY
IRD NUMBER
IRD AUTHORISING OFFICER
TRADING NAME
CONTACT NAME (and their contact details)
DIRECT CREDIT FILE FORMAT
PAYER NAME (and remaining banking details)
TIP
Copy and paste your account details into the BANK ID field, and Jemini will automatically distribute the numbers into the appropriate fields.
Set OWNER to Yes or No.
If set to Yes, you’ll have the option to select the EMPLOYEE AUTONUMBER and POSITION AUTONUMBER.
If set to No, move on to the next step.
For more information on Owners, refer to How to add Owner Organisation Components
Select the Green Tick Button to save and close the panel.
